Network Configuration
In order to properly deploy ExchangeDefender, you need to make several changes on your network. First, you have to change your MX record to point all of your inbound mail to ExchangeDefender. This way ExchangeDefender will stand in front of your mail server and bounce all the dangerous content that is sent to your network. Then, you should change your outbound smarthost to allow us to scan all of your outbound mail*. Finally, enforce IP restrictions so that you can only exchange mail through a trusted connection with ExchangeDefender.
MX Record
Please modify your MX record and change it to: inbound30.exchangedefender.com
You should not have any other MX records for your domain name (subdomain MX records are OK).
Outbound Smarthost
Please modify your SMTP server to route all outbound mail through the following smarthost: outbound.exchangedefender.com
Please follow these instructions to modify the smarthost on Exchange 2003 and 2007:
Exchange 2007/2010
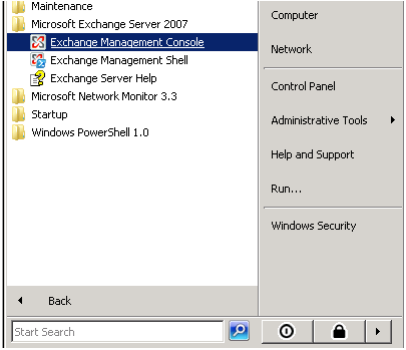
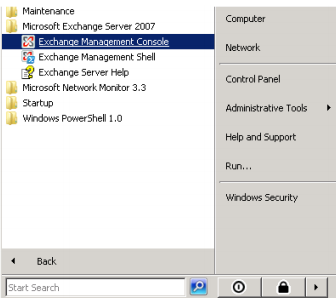
- Login as the Administrative user to your Exchange 2007/2010 server and open Exchange Management Console.
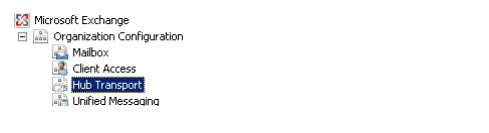
- Expand Organizational Configuration, click Hub Transport.
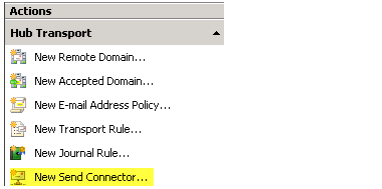
- On the right hand side under Actions click New Send Connector.
- Give the Send Connector a name and select the intended use as Custom

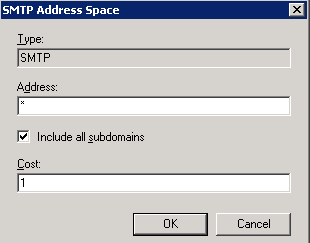
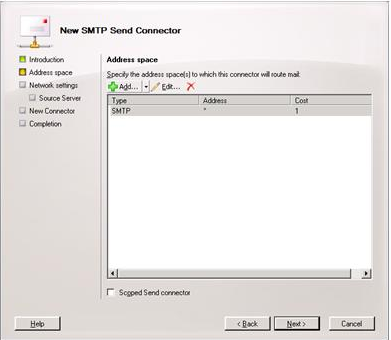
- Click the Add button on the Address Space screen.
- Under Address put the recipient domain name, check include all sub-domains and leave the cost as low as possible, click OK.
- Click Next
- Select the radio button to "Route mail through the follow smart hosts:" and click Add.
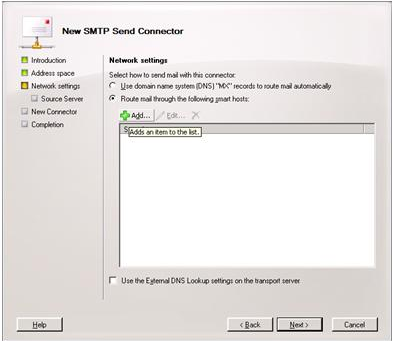
- Select the radio button to "Fully qualified domain name (FQDN):" and enter "outbound.exchangedefender.com" and click OK.

- At this point, you should be able to see the server you specified listed then click Next.

- Since ExchangeDefender uses your server's IP Address to authenticate access, leave the radio button set to Authentication Settings "None" and click Next.

- On the source server screen verify that the exchange server is listed (If not, click Add and find the server) and then click Next.
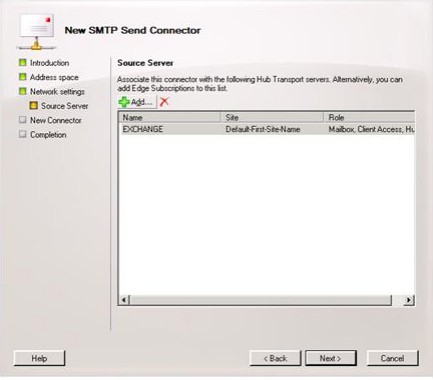
- On the final screen you will see the commands that will be run to create the send connector. Click New and on then Finish.
Exchange 2003
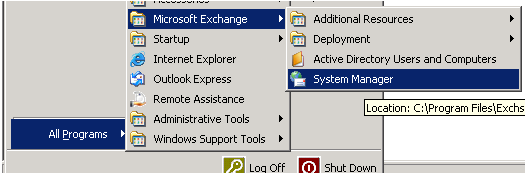
- Login to your Exchange 2003 server and open System Manager.
- Expand Connectors, right click Small Business SMTP Connector (or your active outgoing SMTP connector) and select properties.

- In the general tab, set the radio option to Forward all mail through this connector to the following smart hosts and input: outbound.exchangedefender.com

- Navigate to the Address Space tab and ensure there is one entry with the address specified as * and the Cost as 1.

IP Restrictions
Enforcing IP restrictions is absolutely critical to complete protection of your mail server. Because hackers and spammers can easily bypass cloud services and target your server directly, mail servers protected by ExchangeDefender should accept anonymous SMTP connections only from the ExchangeDefender networks listed below:
65.99.255.0/24
206.125.40.0/24
You should allow inbound SMTP traffic from the above IP ranges only and deny all other traffic. You should only allow outbound SMTP traffic from your mail server to the ExchangeDefender outbound servers.
Please follow these instructions to enforce IP restrictions on Exchange 2003 and 2007:
Exchange 2007/2010
To program the IP address restrictions on the receive connector in Exchange 2007:
- Obtain the latest list of ExchangeDefender IPs from the ExchangeDefender Deployment Guide under Configuring IP Restrictions
- Open Exchange Management Console
- SBS Users: Right click on the "SBS Internet Mail Connector" and select Properties NON-SBS Users: Right click on "Default SERVERNAME" and select "Properties".

- Once the dialog box pops up select the "Network" tab:
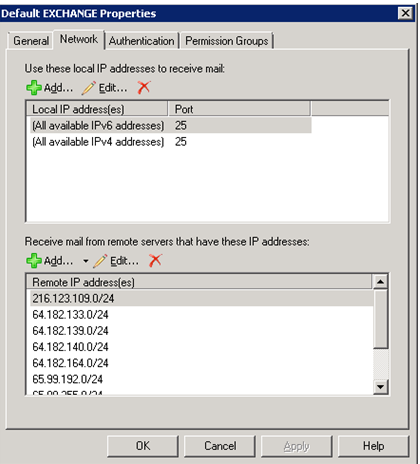
- Under "Receive mail from remote servers that have these addresses:" find the entry that says 0.0.0.0-255.255.255.0 and delete the record.
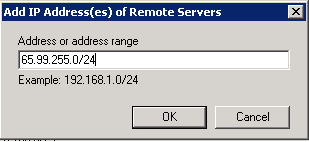
- Under "Receive mail from remote servers that have these addresses:" click Add. Input the first ExchangeDefender IP range/netmask. Repeat this step for each ExchangeDefender IP network in the deployment guide.
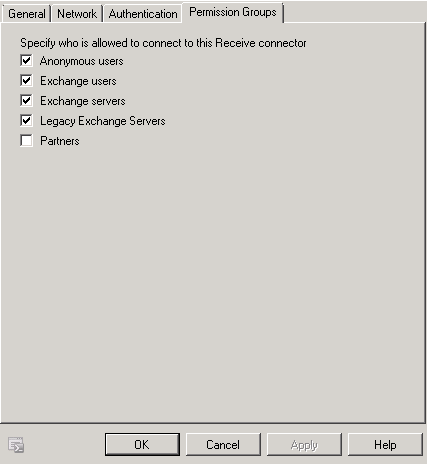
- Please ensure under the Authentication tab that Anonymous delivery is allowed from our ranges.
Exchange 2003
- Obtain the latest list of ExchangeDefender IPs from the ExchangeDefender Deployment Guide under Configuring IP Restrictions.

- Login to your Exchange 2003 server and open System Manager.
- Expand Servers, ServerName, Protocols, SMTP - right click "Default SMTP Virtual Server" (Or the active receive connector name) and select properties.
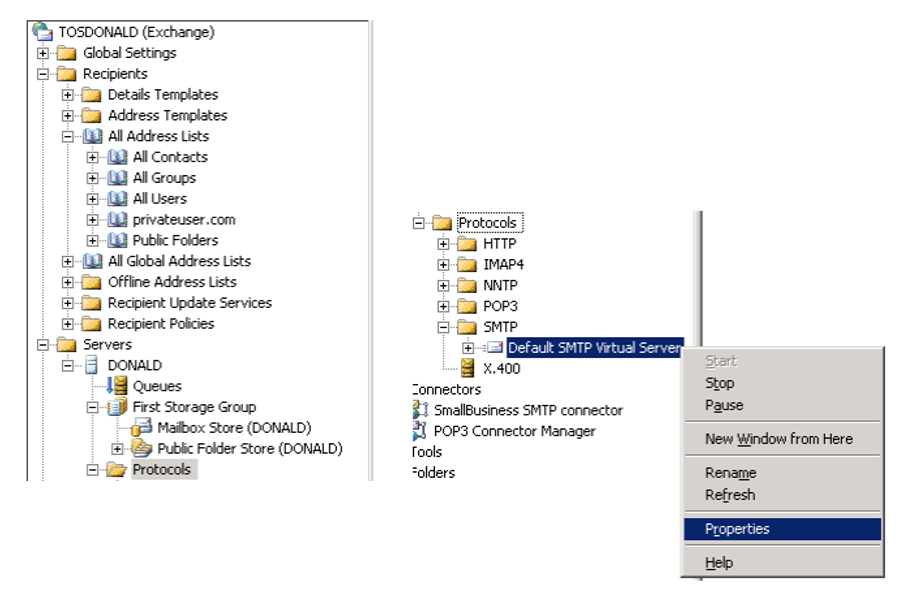
- Navigate to the Access tab and then select the Connection button.
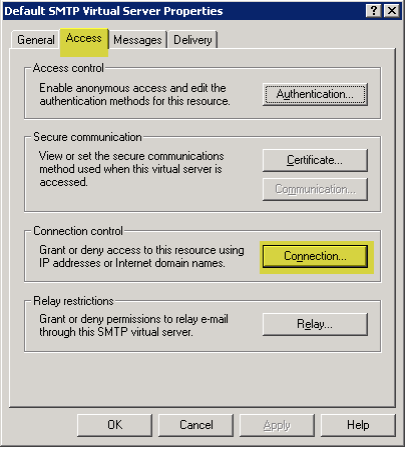
- Remove any entries from previous providers or entries that have the IP range 0.0.0.0 - 255.255.255.0
- Click Add to enter a new IP restriction. Select the Group of computers option, insert the first IP range for ExchangeDefender and set the subnet mask to 255.255.255.0 - click OK. Repeat this step for each ExchangeDefender network.

- Restart the Simple Mail Transfer Protocol (SMTP) service to apply the changes.


