Documentation
LiveArchive Cloud Backend Setup
LiveArchive Cloud Backend Setup
ExchangeDefender LiveArchive enables you to deliver a custom long term email archiving & compliance solution using your own public or private cloud for email storage. This guide will walk you through the process of setting up the storage backend for LiveArchive both on Amazon Web Services or your own Docker instance.
While the process is simple and straightforward, we understand that every organization may not have expertise in cloud infrastructure or you may need some advanced deployment/setup requirements. ExchangeDefender offers a setup and management service for cloud services so please open a ticket at https://support.exchangedefender.com if you think you could use our help.
Amazon Web Services Setup
ExchangeDefender LiveArchive is built using open standards and is designed to run anywhere for years to come. This section of our setup guide will walk you through the configuration of an object storage and database service at Amazon Web Services. Keep in mind that these backend solutions are available from many cloud service providers and you can host them on your own hardware as well.
To get started with Amazon Web Services go to https://aws.amazon.com
AWS Database Setup
ExchangeDefender LiveArchive relies on AWS RDS Database (MySQL) service to store your email message metadata such as sender email address, recipient, subject, message size, and date processed. This metadata enables our LiveArchive web service to retrieve and display messages.
- Search for the “RDS” and select RDS – Managed Relational Database Service
- Click on Create database
- Under “Choose a database creation method” select Easy create and under “Engine options / type” select MySQL
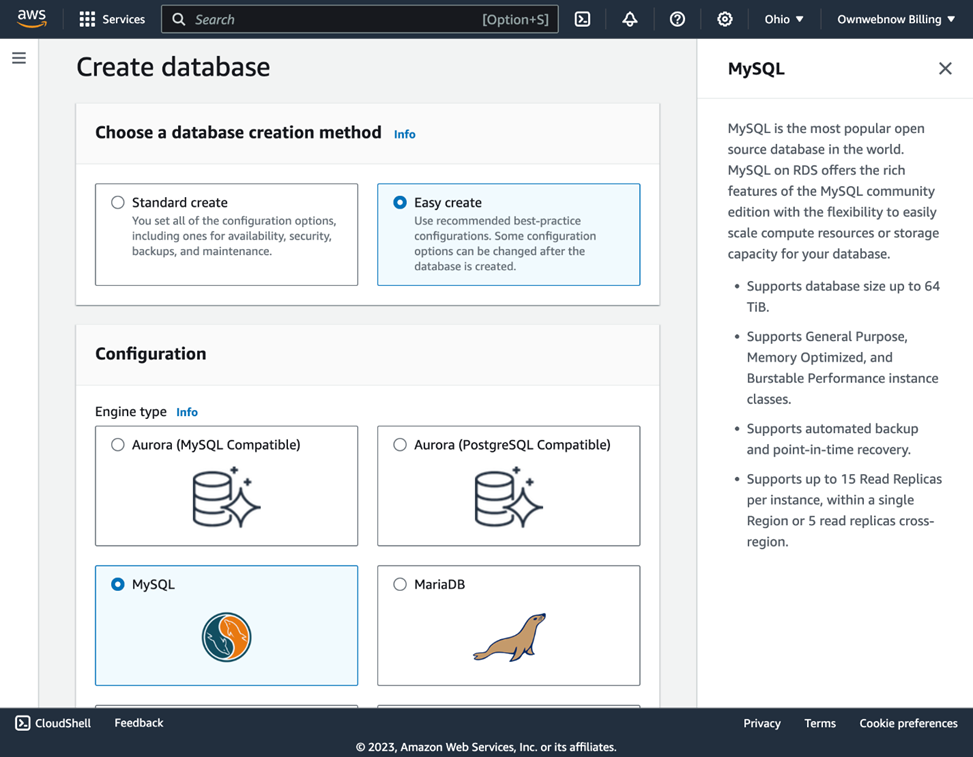
- Scroll down to Templates and select Free tier. You are welcome to select any tier you wish depending on the features and performance you need, but the free tier will do the job for most organizations under 100 users.
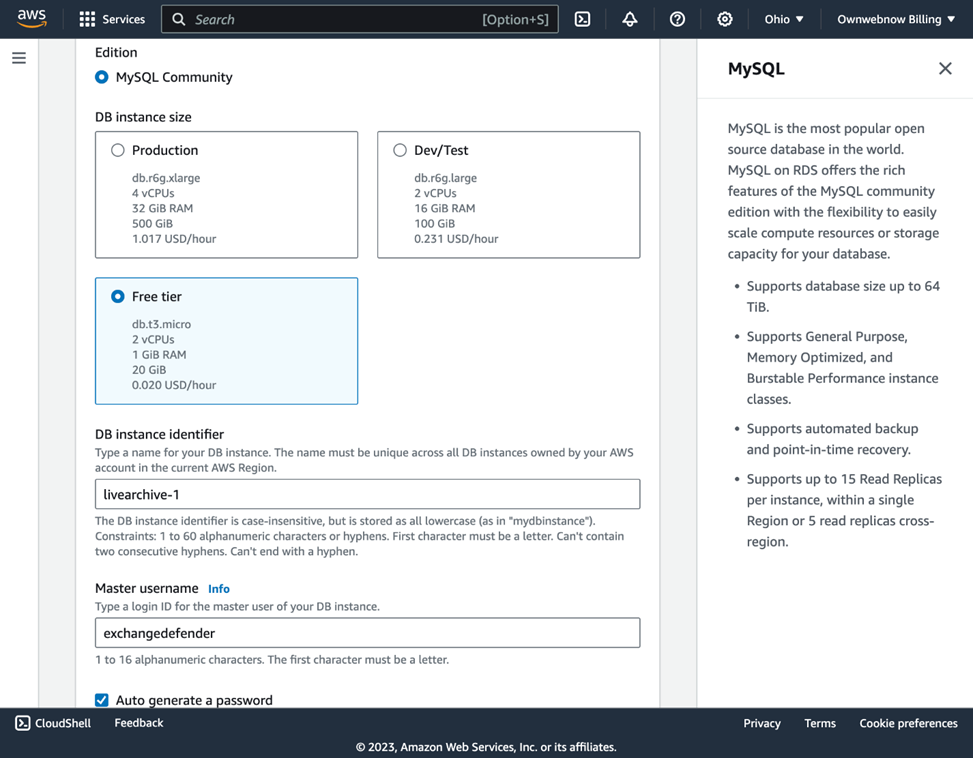
- Scroll down to the DB instance identifier and provide database name, master username, and generate a password.
You can accept the default settings for the remainder of the database setup screen. If you have any questions regarding the rest of the settings or need a more optimal/secure deployment please keep in mind we do have a setup and deployment service available at https://support.exchangedefender.com
Database Access
Next we need to lock your database down and grant ExchangeDefender LiveArchive access to it.
- Click on Databases and select your LiveArchive database.
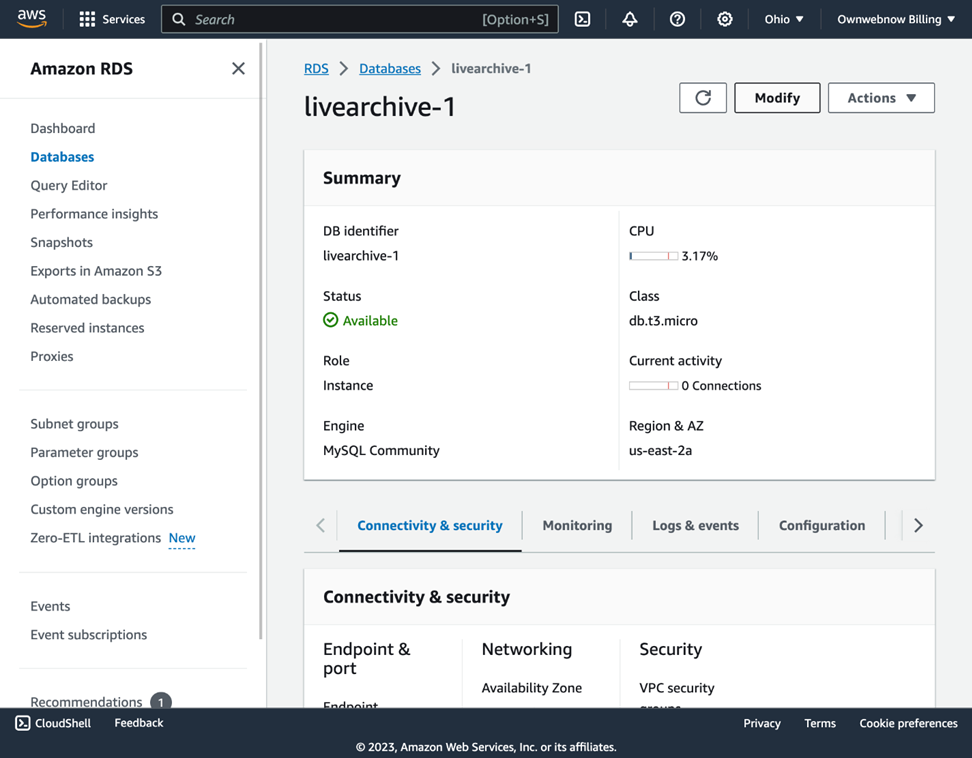
- Click on Connectivity & security and then Modify.
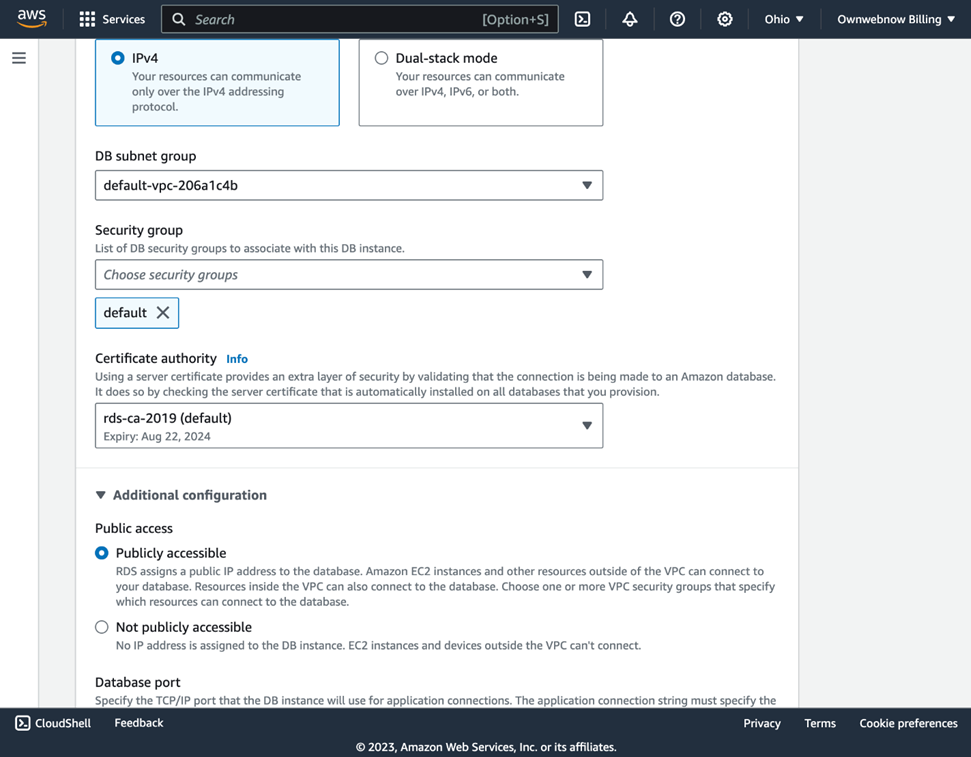
- Scroll down and select IPv4
- Scroll down to Public access and select Publicly accessible
That’s all that is required to setup a basic MySQL database at Amazon Web Services. Confirm that you can access your database from your desktop (free options we use are Beekeeper Studio, DBeaver, or VSCode).
AWS S3 Object Storage Setup
ExchangeDefender LiveArchive relies on an S3 Object Storage protocol to store and retrieve messages. There are many options on how to deploy the S3 or similar block/object based storage solutions depending on your demands and budget, in this guide we will walk you through setting up the free Amazon Web Services S3 object storage bucket.
Just like with the database, let’s go to Amazon Web Services at https://aws.amazon.com
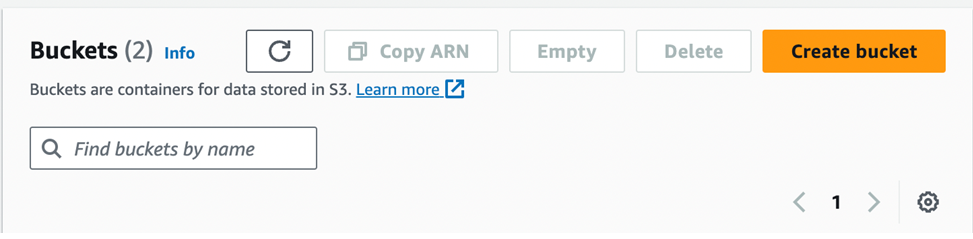
- In the search bar for services look for S3
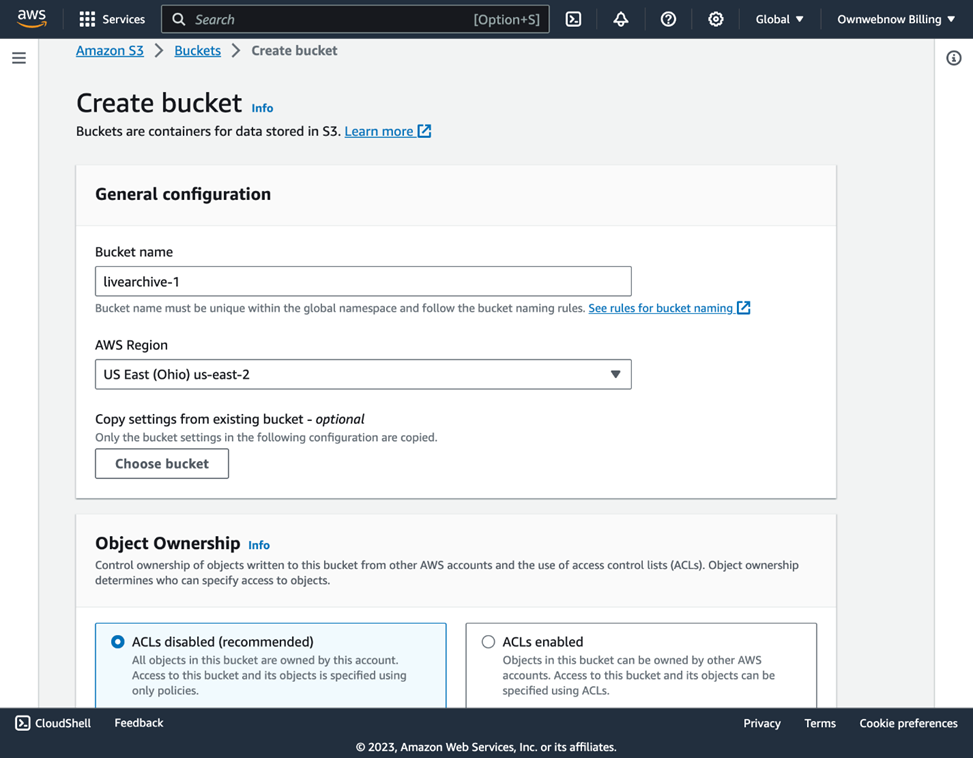
- Click on Create bucket
- Provide the bucket name and select the region.
- Confirm that ACLs disabled.
- Confirm that Block all public access is selected.
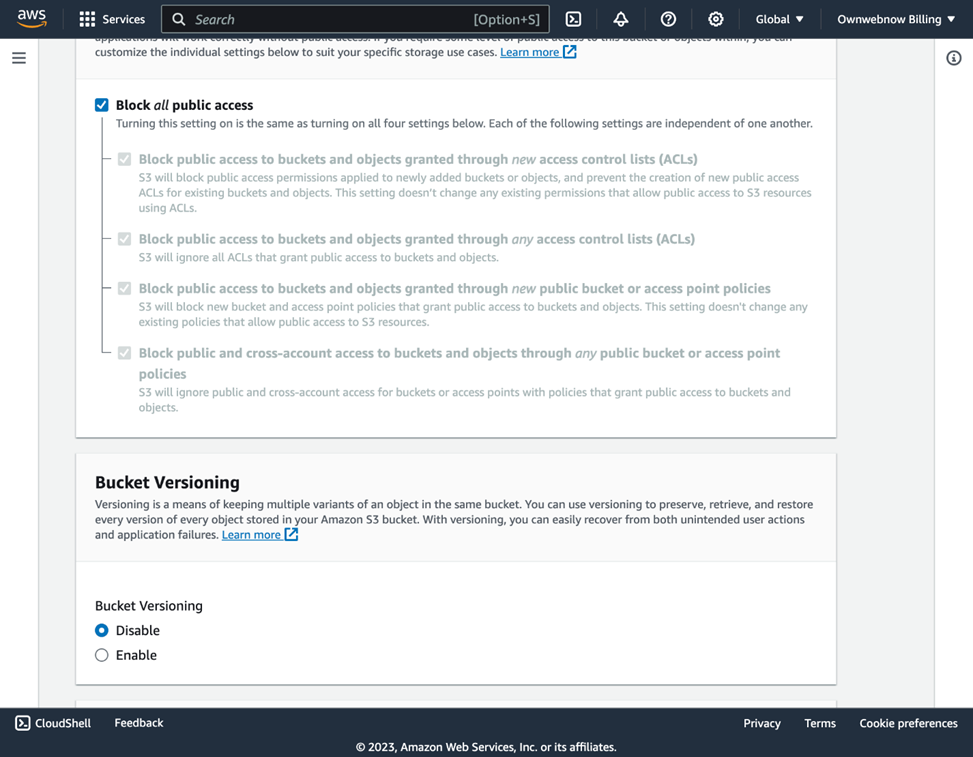
- Under Default Encryption confirm that you’re using Server-side encryption with Amazon S3 managed keys (SSE-S3) and that your Bucket Key is set to Enabled.

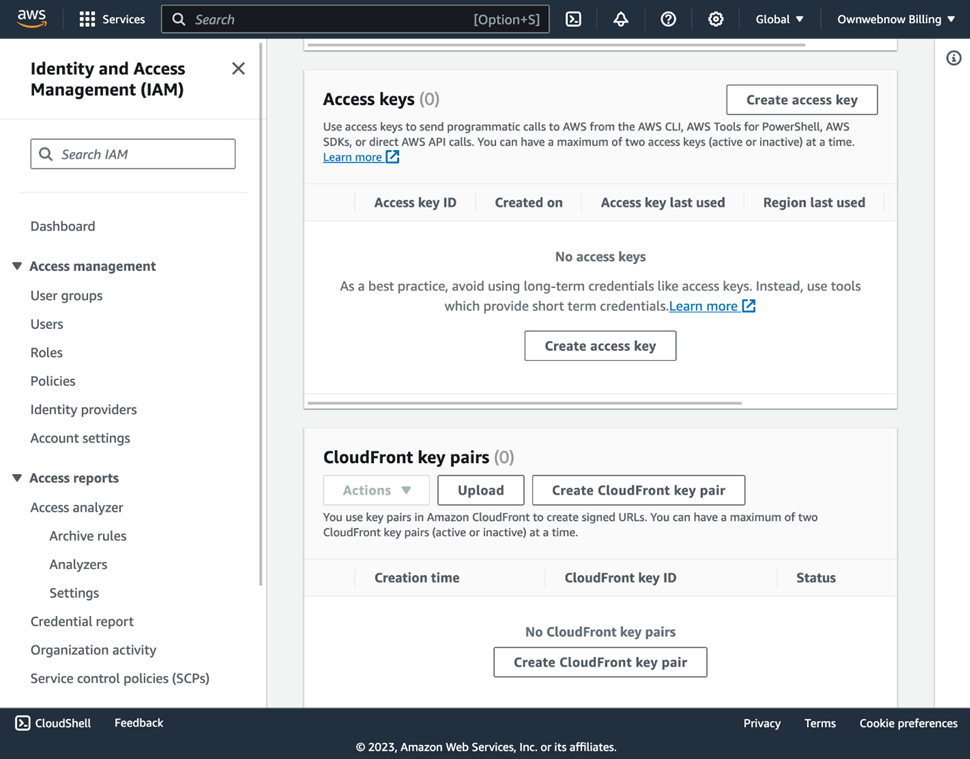
AWS Access Key Setup
Finally, let’s setup our login credentials for the LiveArchive service.
- In the upper right corner click on your account name and select Security credentials.
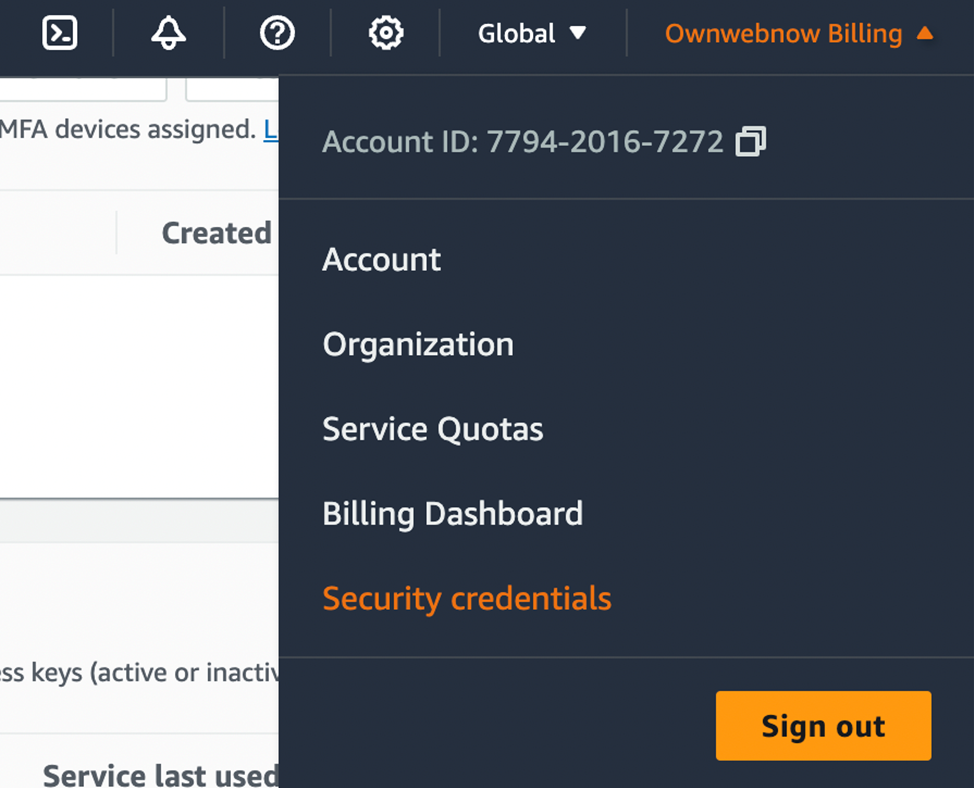
- Scroll down to “Access keys” and click on Create access key
Congratulations, you’ve finished the setup of the Amazon Web Services S3 object storage. Your bucket should be online momentarily and your cloud setup is now complete.
Scroll down to ExchangeDefender LiveArchive Setup section so you can tell ExchangeDefender LiveArchive to use your RDS database and S3 storage as an email archiving endpoint.
Selfhosted / Private Cloud Container Setup
ExchangeDefender LiveArchive can also use your private cloud infrastructure for message and metadata storage. You can run ExchangeDefender LiveArchive in the public cloud, in your own VPS, on your workstation, on your NAS – if you can reach it from the Internet, you can run LiveArchive on it.
Deployment Options
Selfhosted or custom backend offers you the ultimate in power and flexibility. We recommend this option to all our larger, advanced, and strategic clients that need to optimize LiveArchive for a specific purpose. One size does not fit all and LiveArchive can certainly become more powerful, more redundant, more secure, or provide a faster recovery time. Here are some popular deployment options:
- VPS/Linux: If you’re after something custom or if you’re looking to keep the costs down, you can rent a virtual machine for your LiveArchive stack.
- Container Host: (Different from AWS) All major cloud providers offer container hosting, giving you the ability to launch an instance of the LiveArchive stack and scale components individually.
- NAS: Free. If you already have a recent QNAP or Synology NAS you can run the LiveArchive stack on it.
- Docker: Free. From the most complex cluster failover to just running it on your workstation, this is the core of our stack!
Docker Example
If you’re doing this with a container host, VPS, or NAS just install the following docker packages and configure them mariadb and minio/minio.
If this is a part of a more advanced docker configuration we’re assuming that you already have the operating system installed, Docker installed , as well as docker-compose. This is a basic example of the core of our stack and how to launch it in your own docker environment.
Inside of your docker/docker-compose directory create the folders to store database and s3 data:
- rds
- s3
Create the file docker-compose.yml with the following contents:
version: '3.3'
services:
mysql:
image: mariadb:latest
command: --transaction-isolation=READ-COMMITTED --binlog-format=ROW
environment:
-MYSQL_ROOT_PASSWORD: Password1!
volumes:
- ./rds:/var/lib/mysql
minio:
image: minio/minio
ports:
- "9000:9000"
- "9001:9001"
volumes:
- ./s3:/data
environment:
MINIO_ROOT_USER: vlad
MINIO_ROOT_PASSWORD: Password1!
command: server --console-address ":9001" /data
Adjust for your desired username and password of course 😃. Configure MySQL and S3 to your liking and then confirm that you can access the services externally!!!
This is only the minimum example required for the service to run, you will of course have tons of options and ability to fine tune your Docker or container environment to make LiveArchive perform as required.
ExchangeDefender LiveArchive enables you to build exactly the kind of backend that you need. From just message backups to a full eDiscovery suite, LiveArchive can scale to serve tens of thousands of users per instance.
ExchangeDefender LiveArchive Setup
ExchangeDefender LiveArchive is managed through the ExchangeDefender Admin portal at https://admin.exchangedefender.com
(make sure you click on Administration to login as the Domain Administrator)
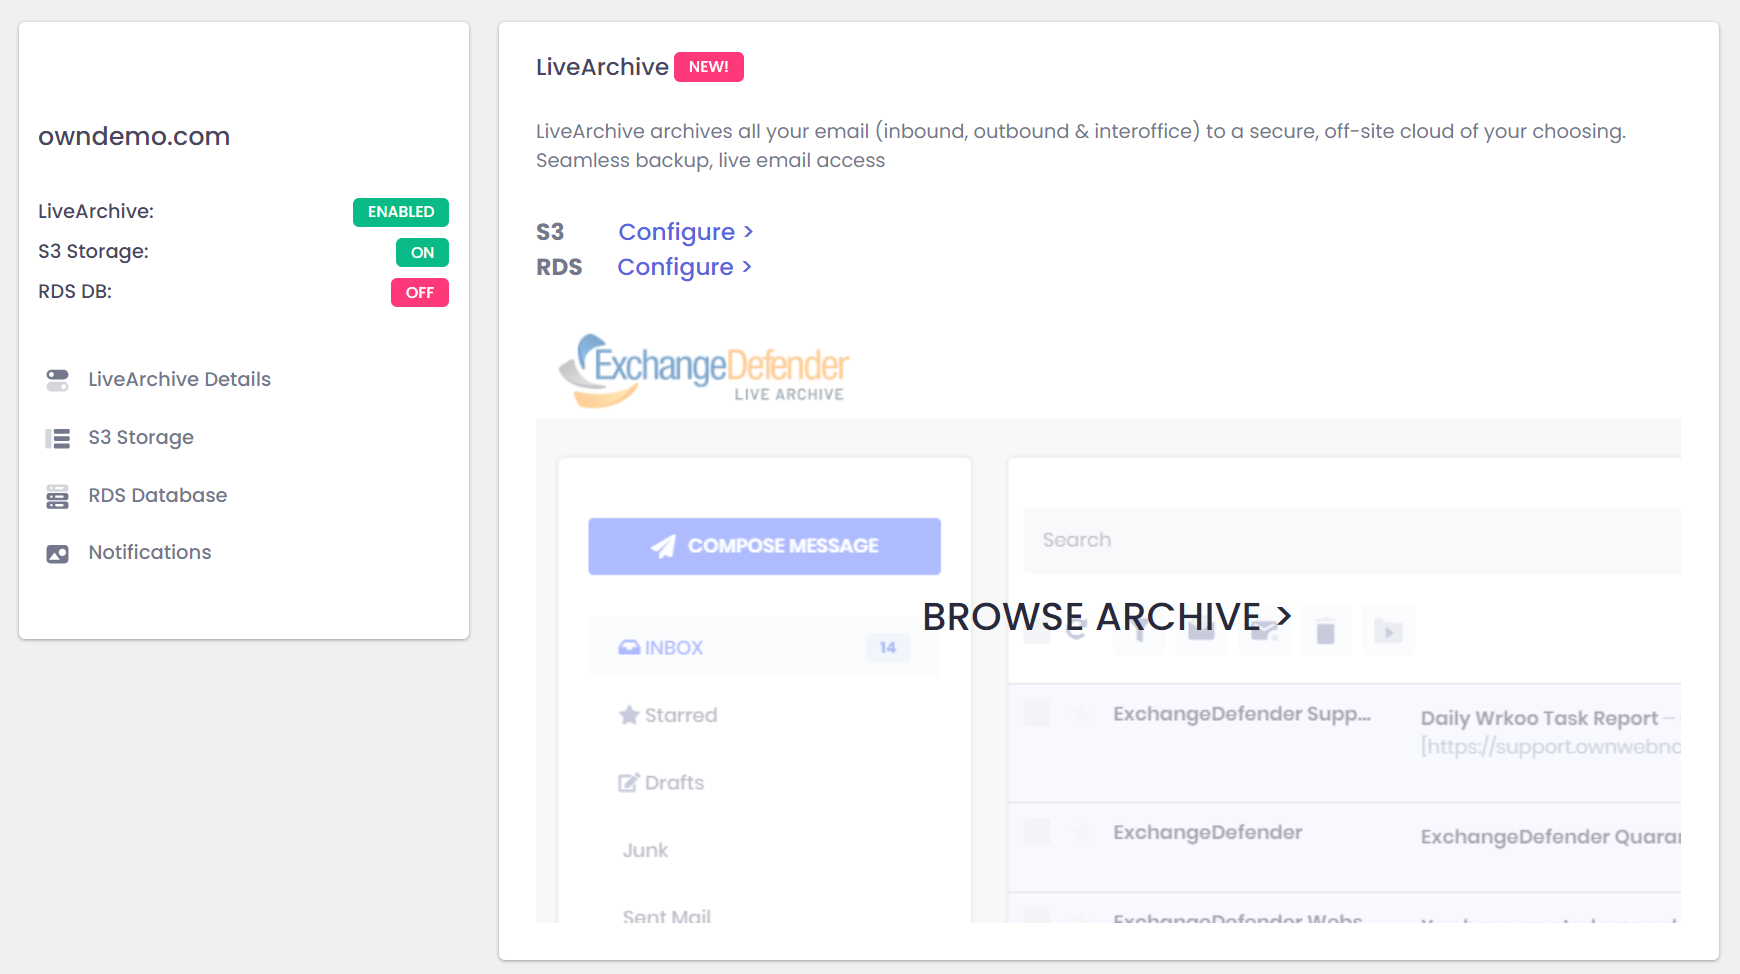
Overview
ExchangeDefender LiveArchive processes archived messages in your organization and delivers them to a cloud endpoint of your choice.
For the minimal operation you will need an Amazon Web Services S3 or other S3 compatible object storage bucket. This is the medium on which email messages are stored securely and it offers a lot of flexibility and price points (including free!)
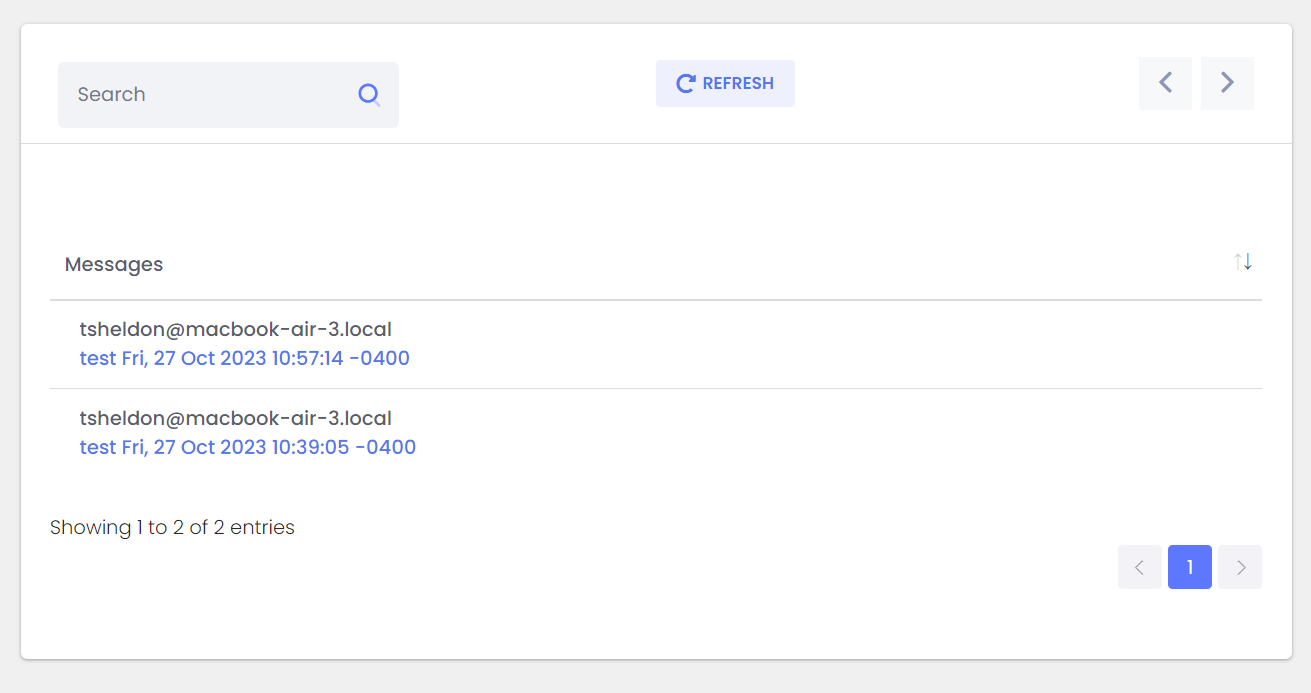
For the standard operation you will need S3 as well as RDS or MySQL database engine to store metadata such as email sender, recipient, subject, date and size. With MySQL you also get the ExchangeDefender LiveArchive Email Viewer which enables users to view their archive mailbox and read individual emails in a web browser.
We recommend deploying LiveArchive with the Amazon AWS S3 and RDS in the free tier to confirm it meets your needs. After you’ve completed the test, we recommend looking at a wider range of cloud offerings to make sure LiveArchive backend is suitable for your needs. Or you can set it and forget it on Amazon. Your choice!
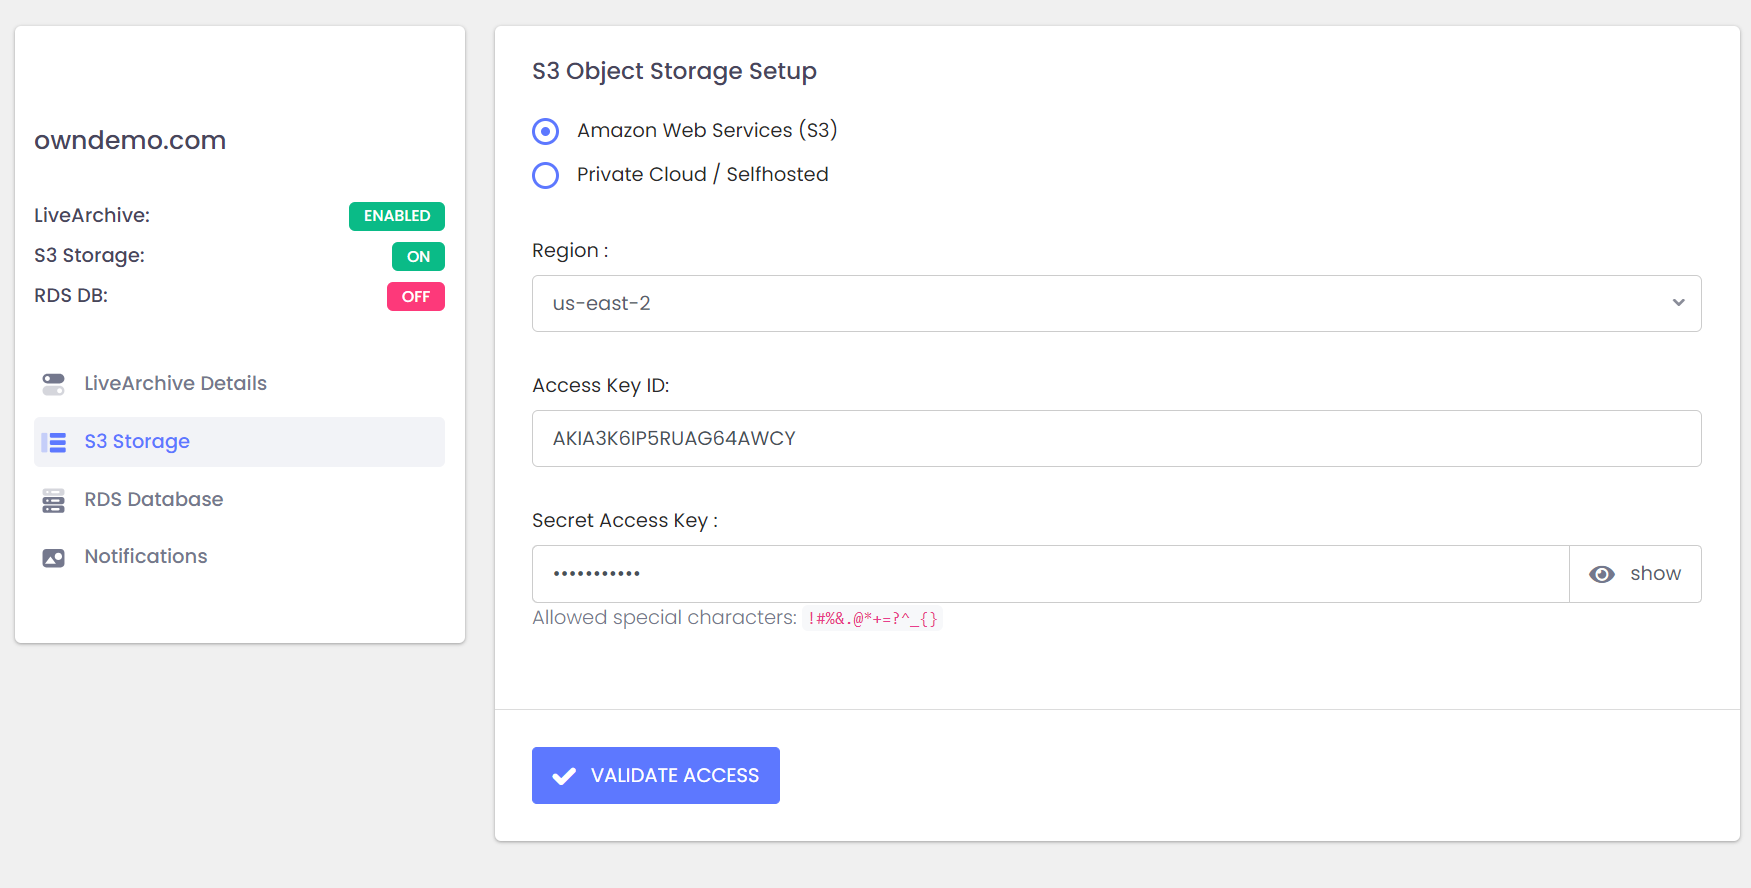
Setup S3
ExchangeDefender LiveArchive stores email messages on the S3 object storage service that is available from a variety of vendors. Select your S3 provider and fill in the details.
Our system will attempt to login to your S3 bucket, create a folder, create a file, confirm all the security and permissions are set correctly and will archive messages to that bucket.
Setup RDS
ExchangeDefender LiveArchive stores email metadata for each message in the MySQL database engine. While this is an optional feature for LiveArchive, it is highly recommended and required for the LiveArchive Web UI.
Please fill in the details on how to access your database and click on Save. Our system will attempt to access your database and confirm all the security and permission requirements are met.

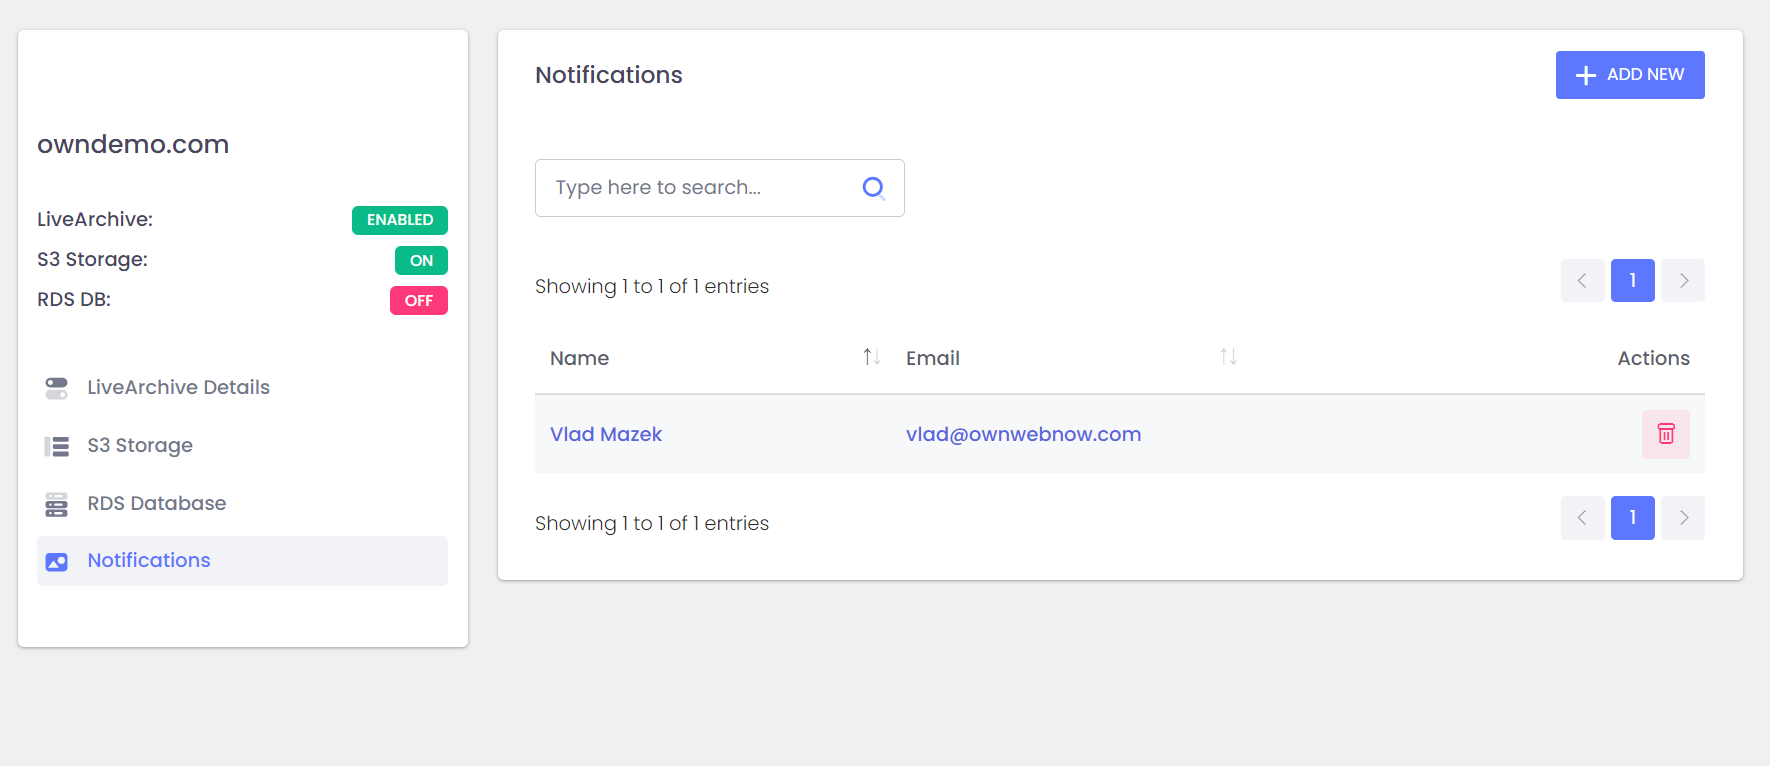
Setup Notifications
ExchangeDefender LiveArchive can send notifications when it is unable to reach required services for archiving. Click on +Add New button to add a new user. We will send them an email whenever we cannot access either S3 or RDS service.
Setup Archiving / Backup
With S3 and Database setup, it’s time to setup archiving. Your system provider or mail platform will create a journaling process for you and the address to forward those messages will be displayed here under LiveArchive Details.
This is the most important piece of the setup as this is what is responsible for delivering email messages to ExchangeDefender LiveArchive in the first place.
If you have multiple domains in your organization you can select which domains you wish to enable archiving for.
ExchangeDefender LiveArchive Support
ExchangeDefender LiveArchive is a highly flexible email archiving and backup solution that can be customized for the most affordable long term backups to the most redundant email archiving solution money can buy.
ExchangeDefender is here for you to help you deploy and customize ExchangeDefender LiveArchive for a specific need. To get the project started, please go to https://support.exchangedefender.com and open a ticket. We’ll get you an appointment date and approximate project costs and go from there.
Deployment Support
ExchangeDefender LiveArchive is simple to deploy and you need little more than this guide. However, we know a lot of our clients don’t have certified staff and would rather have someone else go through the process and confirm it works. This project includes:
- Deployment of LiveArchive on a cloud platform
- S3 and Database setup on Amazon or public cloud container service
- Confirmation of mail flow and
- Deployment of LiveArchive Web UI on a cloud platform
- Full documentation writeup and recommended service actions
- Setup & testing of service alerting systems
Archive Consulting
ExchangeDefender Archive Consulting is ideal for anyone looking to solve a particular problem with LiveArchive. We have deployed LiveArchive for:
- Optimization for business continuity and quick failover
- Optimization for email message backup and recovery service (self service)
- ACL and account management for the LiveArchive Web UI
- Support for Microsoft M365 and Google Gmail deployment, configuration, and security
- Support for Docker deployment and configuration
- 1 hour consulting session to discuss the tradeoffs and benefits of different cloud provider options
- 30 minute implementation session and security audit
We have full confidence that you will join thousands of organizations that use ExchangeDefender LiveArchive to backup and archive their email with this guide alone. Remember, so long as you can connect to your instance using cyberduck.io and dbeaver.io everything will flow smoothly.