Documentation
Service Manager
Create and manage Hosted Exchange mailboxes for your clients using Service Manager.
Service Manager
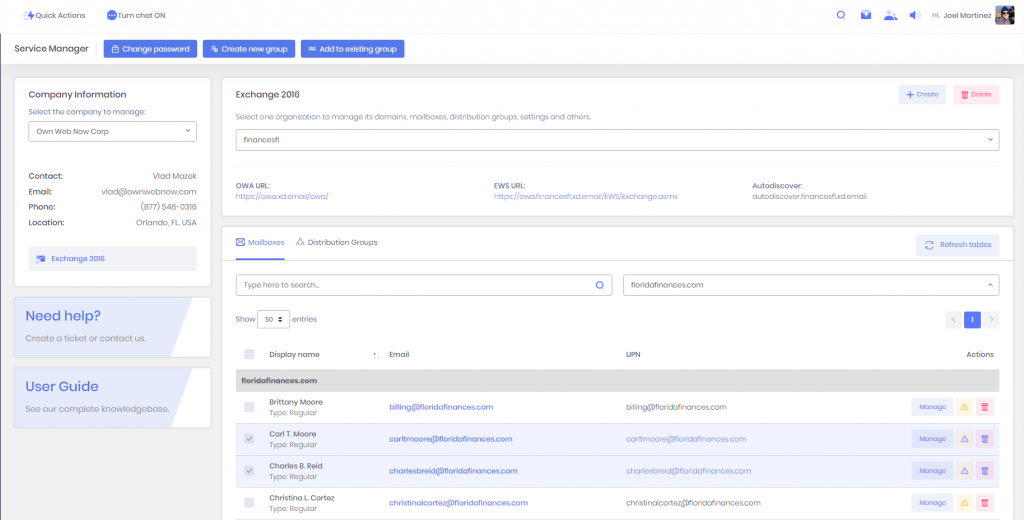
To manage the Hosted Exchange mailboxes for your clients, you will use the Service Manager. You can access your service manager inside our support portal at support.ownwebnow.com > Service Manager.
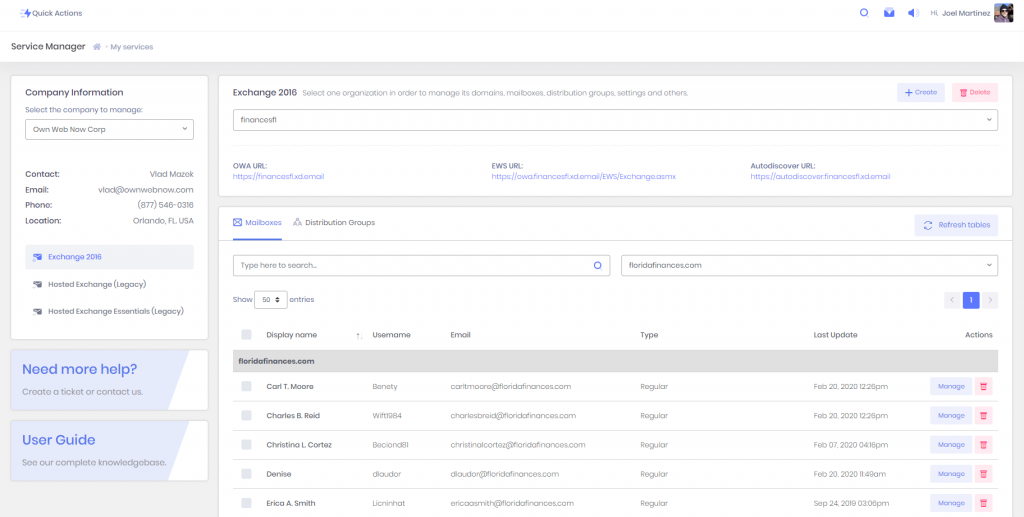
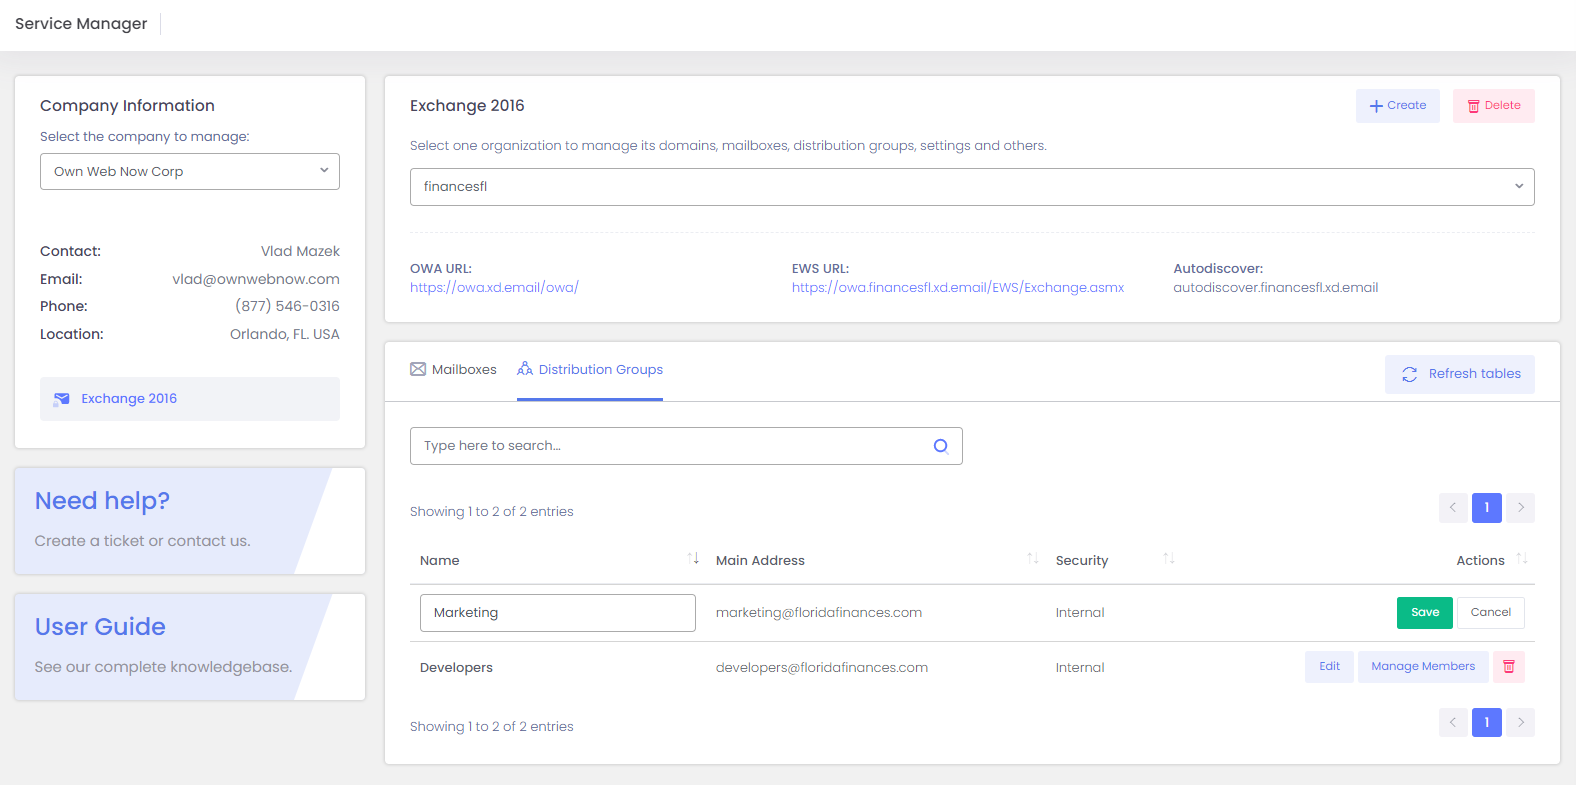
Step 1 – Select the organization that you would like to manage by using the dropdown menu under “Company Information”.
Step 2 – Once you select the organization, the list with all the domains mailboxes and distribution groups under that organization will be updated below. (It is possible to search for specific accounts or filter by domain if you wish.)
Create a new mailbox

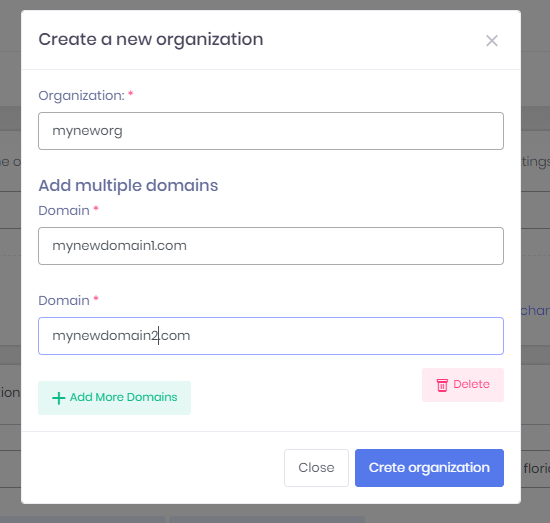
If you click the + Create button, a list with options will be displayed:
- New organization
- New mailbox
- New domain
If you click on create organization, a pop-up window will be displayed where you would have to type the name of the organization and add as many domains as they need at once.
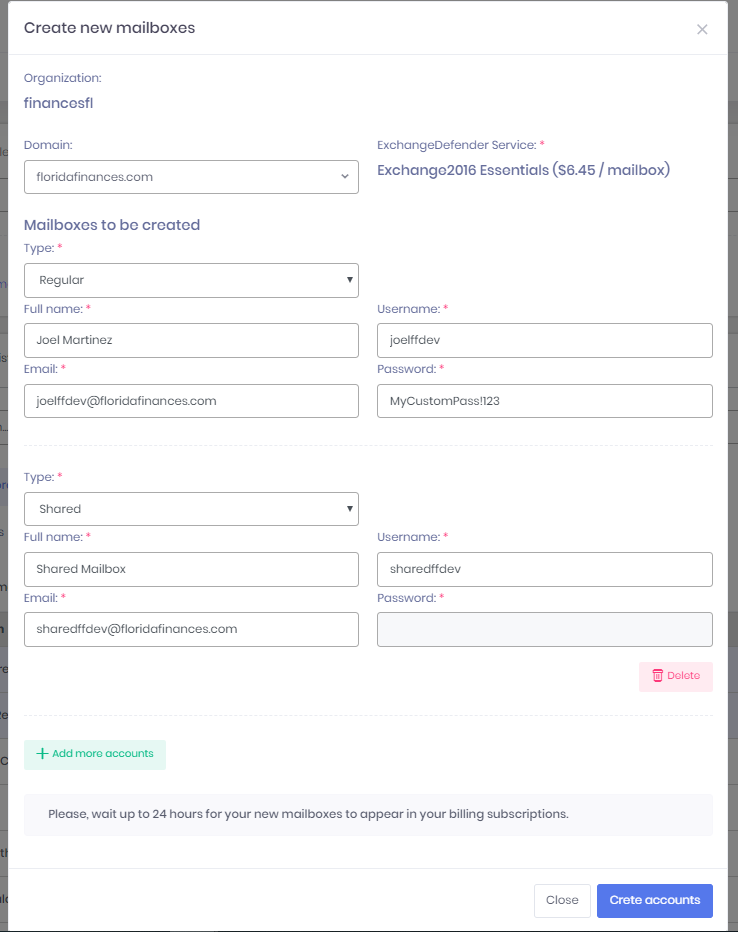
If you click on new mailbox, a pop-up window will be displayed where you would have to select the domain and then type all the information for each one of the mailboxes.
Creating multiple domains has the same process as new domain(above)

Hosted Microsoft Exchange Mailbox Management
Management Quick Tips:
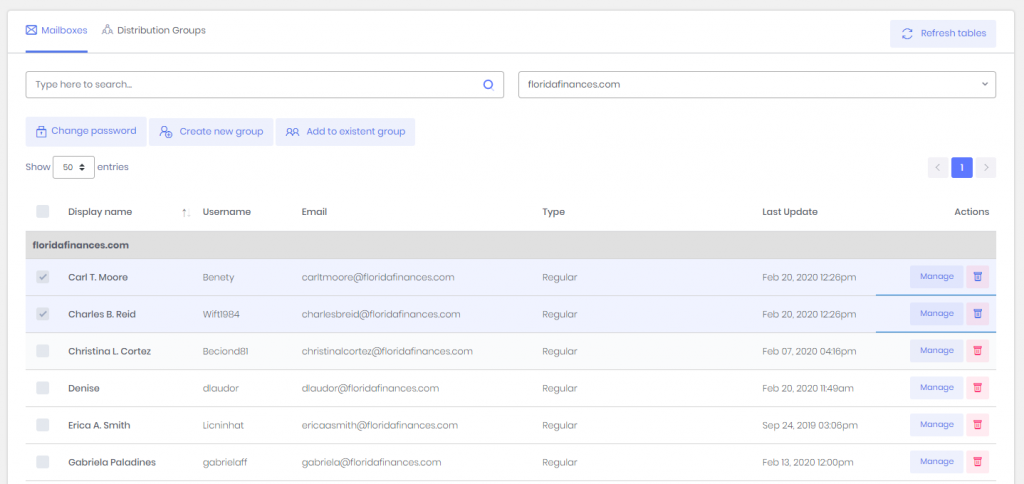
- The list of accounts is now grouping the records by domain, and sorting them by the display name in ascending order, that way it makes it easier to find accounts when you have a lot.
- From there you can change the password of multiple accounts at a time, create a distribution group based on your selection or add the accounts selected to existing distribution groups
- You can also delete accounts
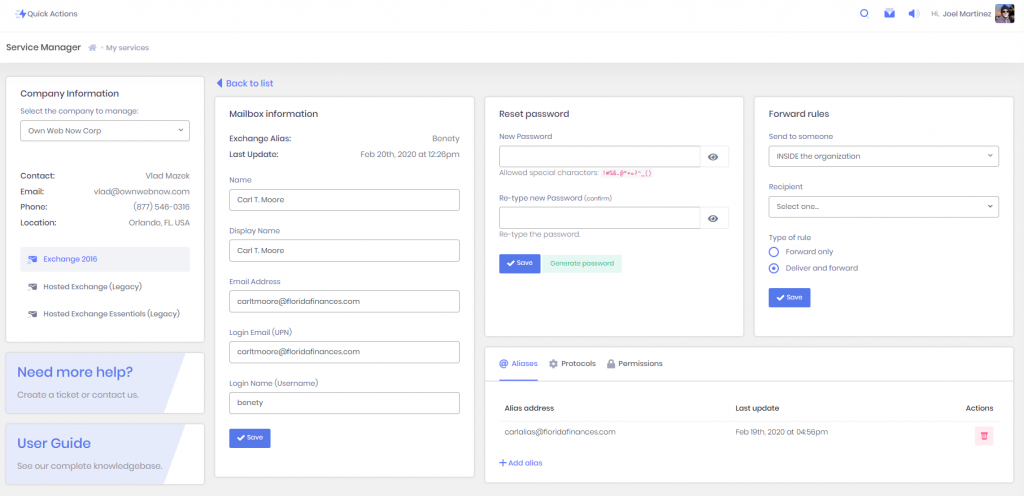
The Manage Button
If you click on Manage, another view will be displayed with the information of the account selected. From there they can:
- Update the information of their account
- Reset their password
- Create a forward rule
- Add aliases
- Configure their protocols
- Add permission rules
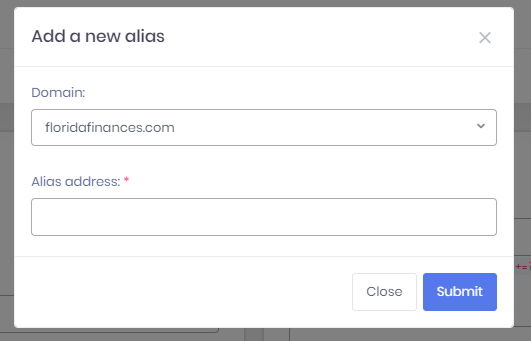
From there, if you want to create new aliases, they just have to click on the button +Add alias

How to add an alias
To add an alias they will have to pick a domain, and type the local part of the email (local part of the email is everything before the @) and the alias automatically will be displayed in the table.
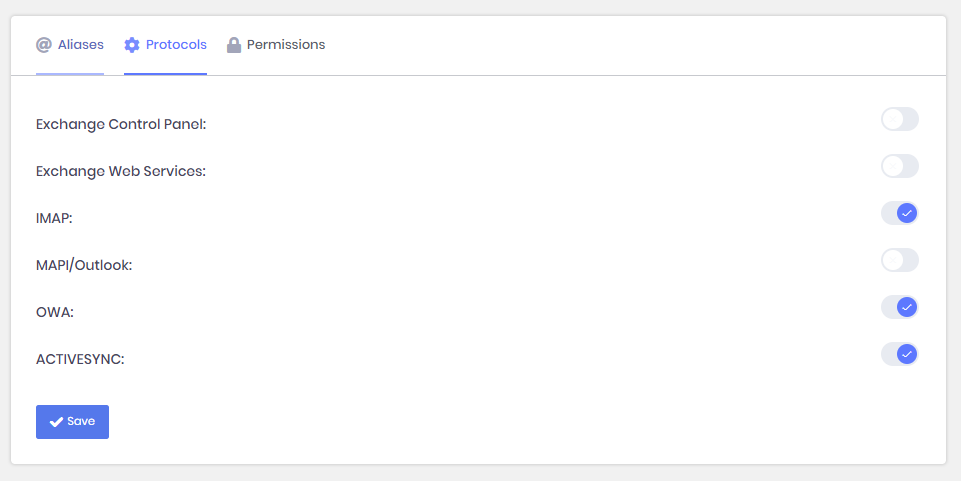
Protocols
To update their protocols they just have to click on the switches to turn them on/off and click on save.
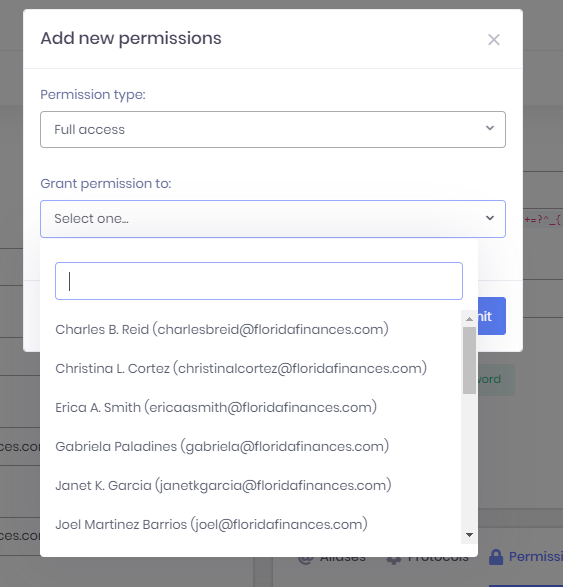
Permissions
The permissions work pretty much the same way as aliases, with the exception that you have more options.
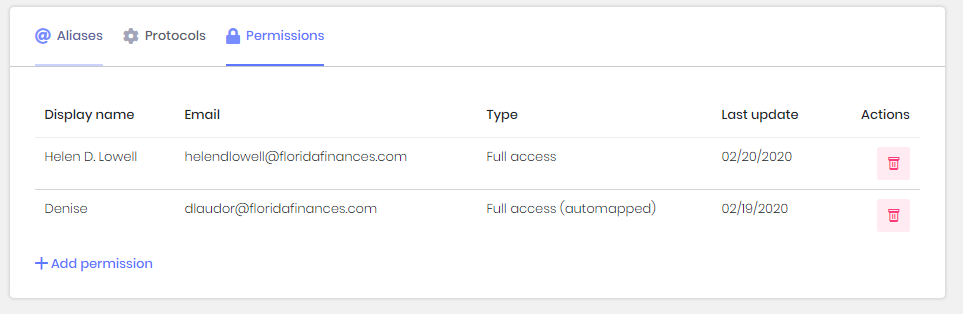
To add permissions, you must select the type of the permissions you would like to grant and the account (only accounts under your organization will be displayed that do not have a permission rule created for the same mailbox, that way there are no repeated permission rules for the same pair of mailboxes)
Distribution Groups
Organizations of all sizes use distribution groups to setup internal and external mailing lists, so that one role address like sales@ or info@ can be automatically delivered to multiple people. Distribution groups and shared mailboxes play a vital role in how entire departments communicate with internal and external parties, and ExchangeDefender makes managing them a snap.
Creating a Distribution Group
Please select the Organization you wish to manage. As you check users you will see a new toolbar for mass user management: Change Password, Create new group, and Add to existing group.
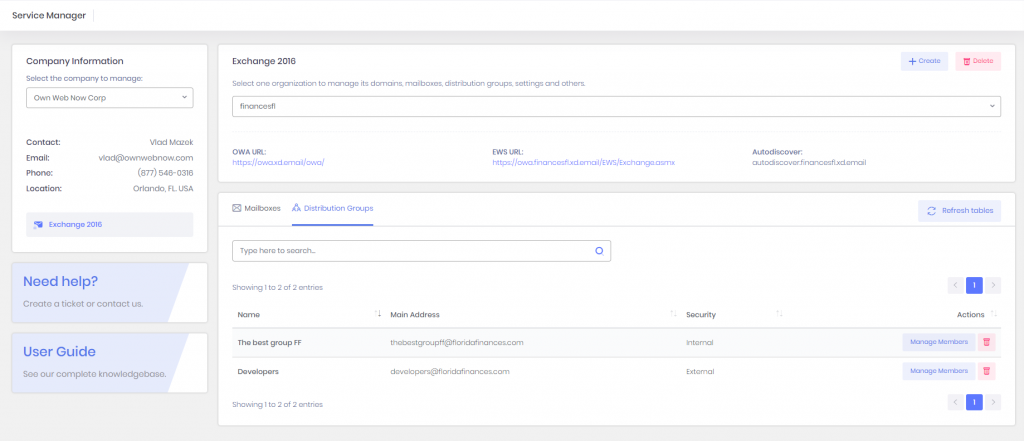
Manage Existing Distribution Groups
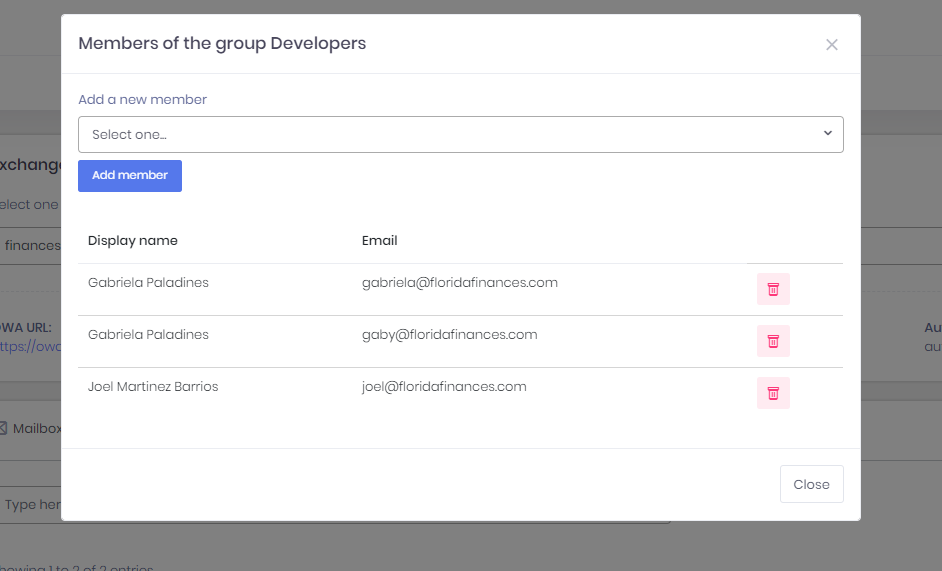
To manage existing groups, click on the Distribution Groups tab. From here you can manage group members or delete distribution groups. Click on Manage Members.
From here you can just select users to add and remove.
Finally, you can also find out which groups a user belongs to. Click Manage on the user you wish to review and then select Group Memberships.
Change Distribution Group Names
To edit the name of your distribution group, simply click the edit button, enter the new group name, then click save.
Now that your Exchange mailbox is configured, follow these instructions to setup your Microsoft Outlook, iPhone, iPad, Mac, Android and more: https://exchangedefender.com/docs/exchange-setup
Internal or External Distribution Groups
ExchangeDefender allows you to choose if Distribution Groups should be Internal or External. Just click on Edit to make changes.
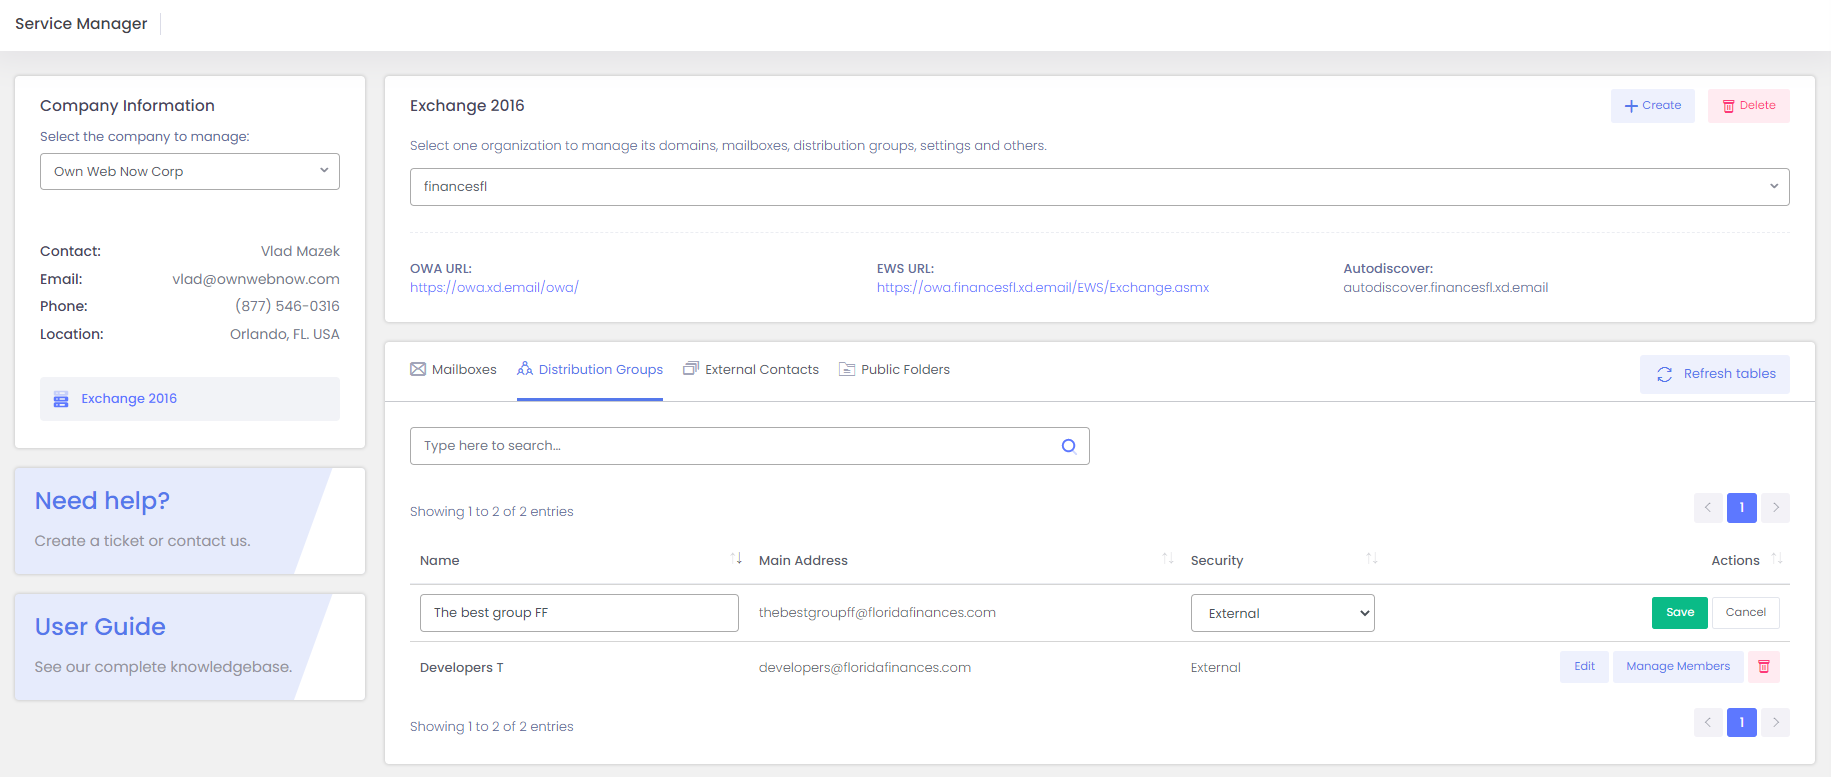
Internal distribution groups are used only by your organization, this means that no email can be sent to an internal group from an address outside of the Exchange organization. These groups are primarily used for interoffice activities.
External distribution groups are assigned an email address and they receive mail from the Internet that is then distributed to the group members. This is typical for role email addresses (such sales, info, webmaster, etc) that are typically distributed to multiple users in your organization.
External Contacts
External Contacts or Mail Enabled Contacts are great when you need to give aperson an email address on your domain without giving them their own mailbox. This is a very popular feature in SMB/consulting community when it comes to contractors and third parties that already have their own email infrastructure but for compliance (or vanity) purposes they need an email on your domain.
External Contacts allow you to assign an email address on your domain (vlad@ownwebnow.com) and automatically forward all their mail to their existing email address (vlad@exchangedefender.com).
Not only does this feature help save money on licensing costs, it also eliminates the need for the person to setup another account and check mail at a new place.
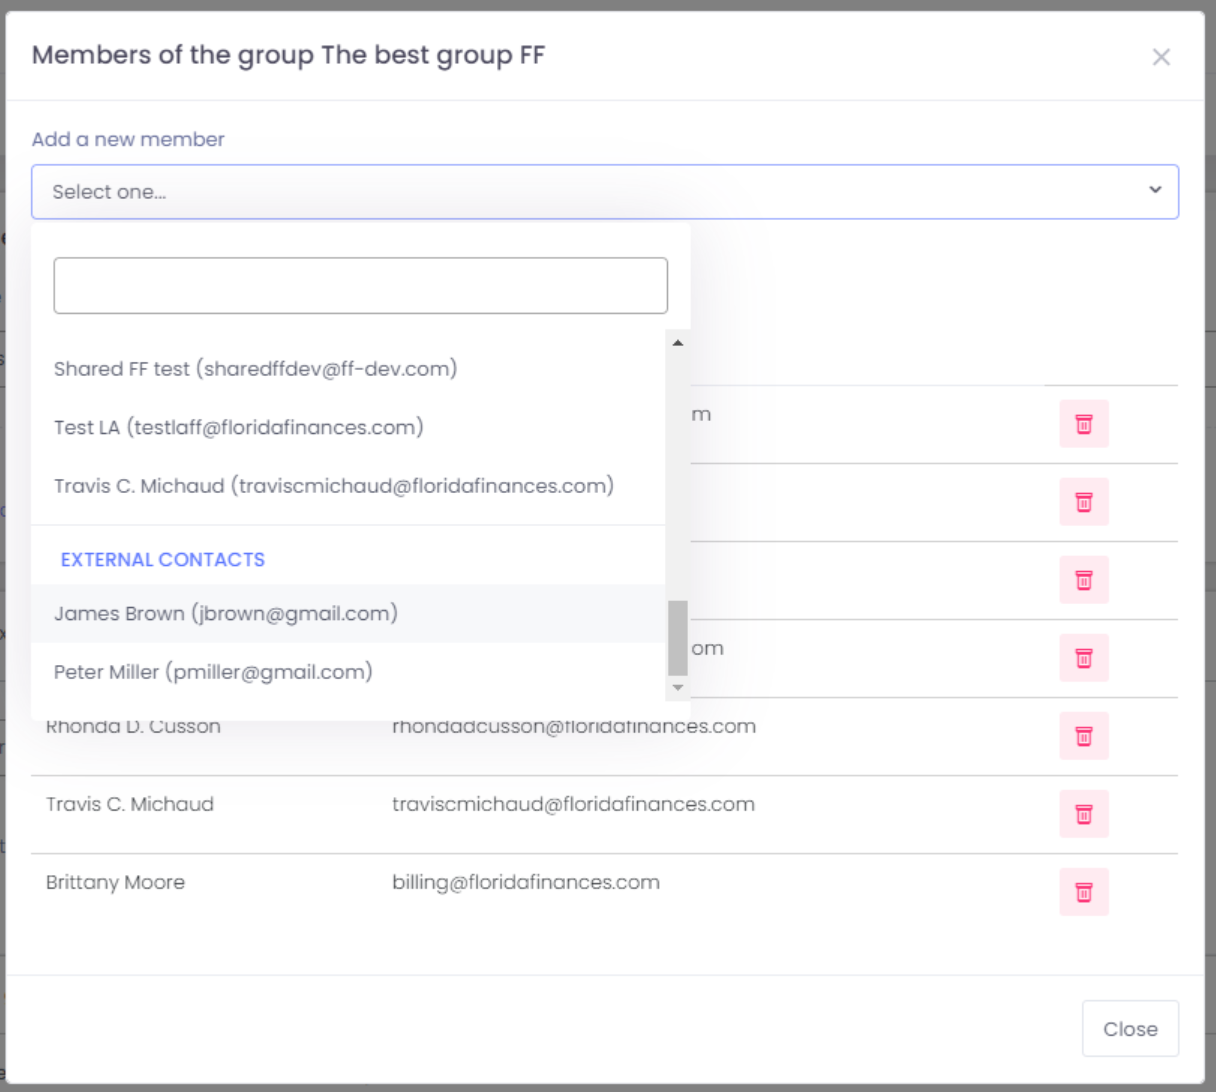
The upgrade we're announcing today has to do with External or Mail Enabled contacts as a part of a Distribution Group (Exchange term for "mailing list"): You can now add external email addresses to any internal/external distribution group from the Service Manager at https://support.ownwebnow.com. Now when you try to create or modify a distribution group, your "Add a new member" screen will show your defined external contacts as well!
This is one of the most demanded features in Service Manager, and we hope it serves your business well!
But her (external) emails!
Unfortunately for some, the Internet standards still apply and most service providers are rapidly removing features that have anything to do with external mail forwarding. This is mainly due to rise of SMTP authentication/authorization protocols like SPF, DomanKeys (DKIM) that do not work with the way mail enabled external contacts are implemented in Microsoft Exchange and other email servers. When the mail is being forwarded to the external contact, the From line remains intact so that the recipient can identify the person sending the email (for example, vlad@vladville.com). But when the message is forwarded to the external contact, the receiving server will look at the from line and see that the message is from a domain hosted on Gmail but sent from the ExchangeDefender address space (that is obviously not a part of Google Gmail SPF/DKIM record) and depending on configuration might consider that message to be a forgery/spoof/SPAM.
This isn’t an ExchangeDefender issue, or a Microsoft issue, or a Gmail issue, it’s a part of the protocol specification. And while everyone else is making this feature go away (because it can affect server reputation), we’re working on rewriting/improving it. We are currently working on a feature that will rewrite the From line, so when Exchange forwards an email “From: Vlad Mazek ” to an external contact, the recipient will get an email that shows this on the from line: “From: Vlad Mazek ” that will help bypass SPF/DKIM checks on the receiving side.