Exchange Setup for Android Devices
HOW TO GUIDE
Please note:
Setting up ActiveSync on an Android device is very simple. You only need three pieces of information like you would in an AutoDiscover deployment of Outlook: email address, password, and server name.
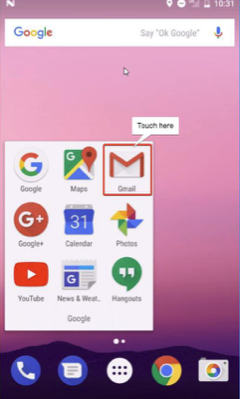
Step 1: Locate the Gmail app on your phone
Locate the Gmail app on your smartphone and open it. It’s usually in afolder labeled ‘Google’ or its located in the app drawer.
Step 2: Add email address
Select Add Another Email Address. Click Next,

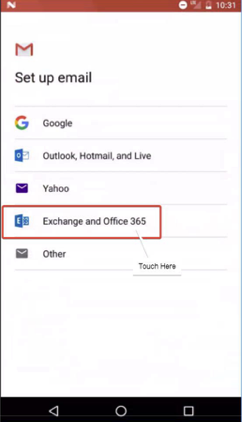
Step 3: Set up Exchange & Office 365
Select ‘Exchange and office 365 as your account type. Tap Next,
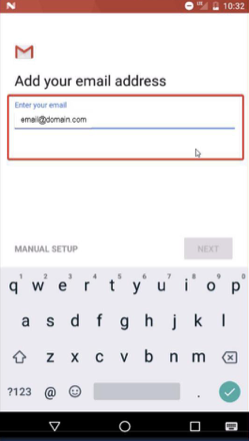
Step 4: Enter your email address
On the next screen you will be asked to enter your email address. Enter there and touch next.
Step 5: Incoming Server Settings
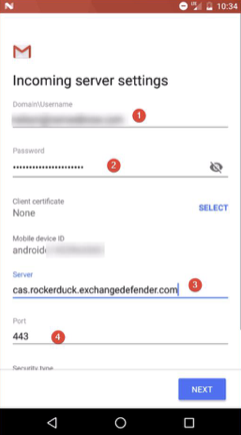
- Enter your Domain\Username. It will look like this‘Rockerduck\demo@domain.com’ Your domain would depend on the server you’re on. So if you’re on Rocker-duck, the example above will suffice. If you’re on louie, then add louie and so on.
- Enter Your password. Make sure you enter your correct password foryour email Server. Again, if you’re on rock-erduck, type in – cas.rockerduck.exchangedefender.com, same goes for all the other servers. Make sure youstart with ‘cas.’
- Leave this as the default value which should be 443. If thatisn’t present, please add 443
After you confirm that everything is correct hit ‘Next’
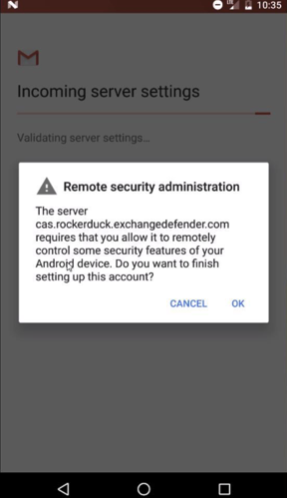
Step 6: Remote Security Administrator
Due to the security of Exchange, Gmail will prompt you to setup that account as a Remote Security Administrator, hit ‘ok’.
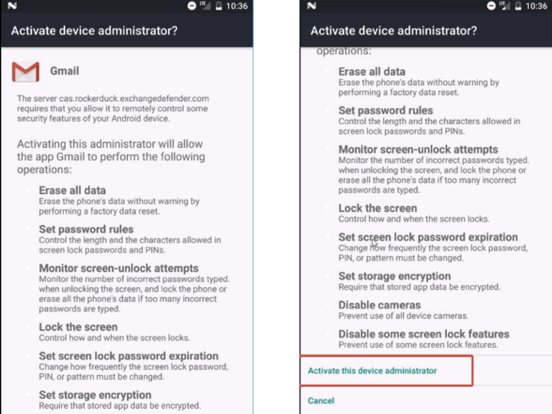
Step 7: Activate Device Administrator
Now you’ll be prompted with a screen that explains what remote access administrator is. These are policies set by Exchange in the event that your phone gets stolen or you lose it. Scroll down and touch the activate this device administrator.
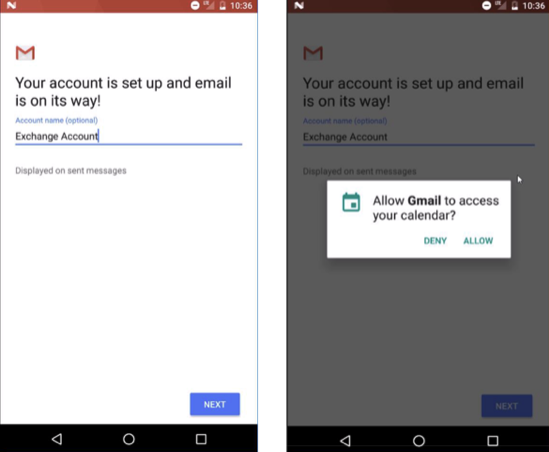
Step 8: Account Setup Confirmation
And now you’re at the end of the setup. Name the account anything you wish so you can identify it as your work ac-count and then give it permission to view your calendar options and you’re all set!