ExchangeDefender Exchange Setup
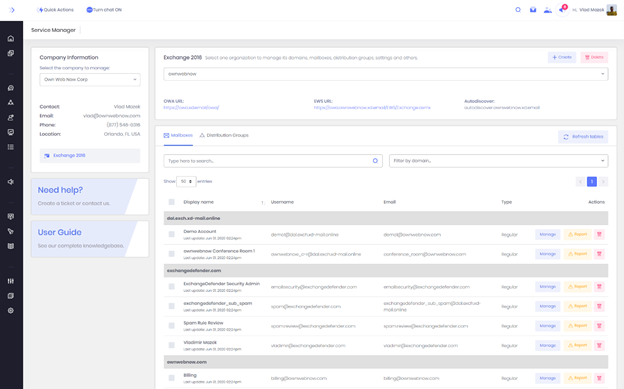
This guide is intended for IT solution providers, CIO, and technical staff that is in charge of setting up and managing email. While Exchange is a very complex and robust environment, our control panel is designed to help personnel of all technical skill levels manage email. In Figure 1 above you can see our Service Manager, the user friendly way to manage every aspect of email in your Exchange organization.
This site is accessible at https://support.ownwebnow.com and your MSP/CIO has access to manage the Service Manager on demand. For the purposes of this guide, we only reference this site because it is where management begins: the rest of the guide is to help every user configure their Microsoft Outlook, or mobile Android / iOS devices.
Important Server Names
Microsoft Outlook, iOS and Android devices connect to the Microsoft Exchange infrastructure through several web services. If your IT provider has configured your Autodiscover DNS properly, you will never need to know about these sites, but it is important to know where the resources are in the event that you need to configure something more complex to work with Exchange. Figure 2.
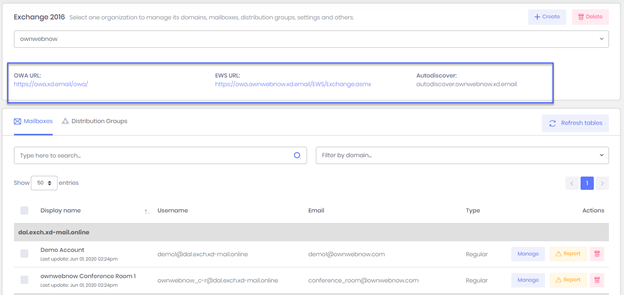
Each Exchange organization managed by ExchangeDefender has their own branded set of OWA, EWS, and Autodiscover records. While we recommend you use the branded one for your organization, the default ones will work the same way and they all point to the same network resources.
Outlook Web App
https://owa.xd.email/owa/
Outlook Web App (formerly known as Outlook Web Access) is the web version of Outlook that works in your browser. While not as powerful or as flexible as Outlook, unless you are a power user, it will do the job. You can point your cell phone, tablet, laptop, or workstation to the URL above and it will give you access to the most popular Outlook features over the web.
EWS URL
https://owa.ownwebnow.xd.email/EWS/Exchange.asmx
Exchange Web Services (EWS) is the web service endpoint for advanced configurations. If you need to integrate a service or a device with Exchange Web Services, this is the URL to use. As of Exchange 2013, there is no support MAPI.
Autodiscover
autodiscover.xd.email
Exchange Autodiscover service makes it easy to deploy Outlook without providing manual configuration parameters – all you need is your email address and your password. Since 2013, Autodiscover has become the only way to configure Outlook/Exchange and manual configuration is no longer possible. If you do not have Autodiscover record in your DNS you need to create it and point it as a CNAME to autodiscover.xd.email (if this is not possible for some reason, see Appendix A)
ExchangeDefender Admin Control Panel
https://admin.exchangedefender.com
Managing ExchangeDefender security, including the included Exchange antispam, antiphishing, and business continuity services, is done through our admin control panel. Most organizations are managed through the domain login (domain.com) or user login (user@domain.com). Please see https://www.exchangedefender.com/docs for more information on how to manage this powerful service.
ExchangeDefender Next Generation LiveArchive (NGE)
https://nge.exchangedefender.com
ExchangeDefender LiveArchive is a business continuity (email resilience) platform independent of Microsoft Exchange that is running in parallel with your email infrastructure. When Microsoft Exchange experiences a technical problem, you can still send and receive email from any device using the same email and password that you use for Outlook and OWA. Please see https://www.exchangedefender.com/docs for more information.
Configuring Outlook
For the purposes of this guide, we are assuming that your IT personnel has already created all the required DNS records (MX, SPF, DKIM, and most importantly, Autodiscover) and that you know your login credentials (you can test them by going to https://owa.xd.email/owa/)
Step 1: Download and run Outlook Registry Tools
Open your web browser and go to the following site: https://www.exchangedefender.com/media/autodiscoverregistryhacks.zip
Step 2: Open the Outlook Registry Tools
Click on autodiscoverregistryhacks.zip to open the archive (Figure 3):
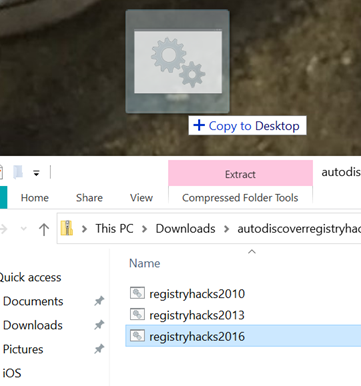
Figure 3: Batch files for Outlook registry entries
Find the version of Outlook you have (registryhacks2016 will work for both Outlook 2016 and 2019) and drag it to the desktop.
Click on Start, type cmd, and then right click on the Command Prompt.
Click on Run as administrator.
Change directory to your desktop: cd C:\Users\YourUsername\Desktop\
Note: Please substitute your username for YourUsername in the path. My example is C:\Users\Vlad\Desktop\
Run the batch file you extracted and moved to your desktop in the previous step. If you do it right, this is the output you will see (Figure 4):
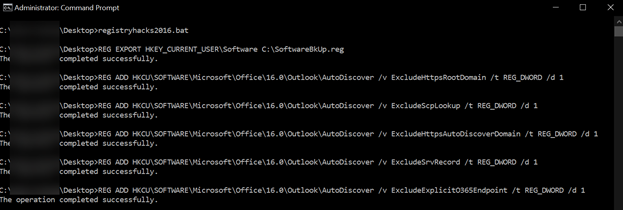
Figure 4: Registry entries being added
IMPORTANT: Reboot your PC.
Step 4: Outlook Configuration
Start Microsoft Outlook and your configuration wizard will start. This process can take a few minutes for each step to be complete, if you’re waiting more than 10 minutes something is likely not done correctly.
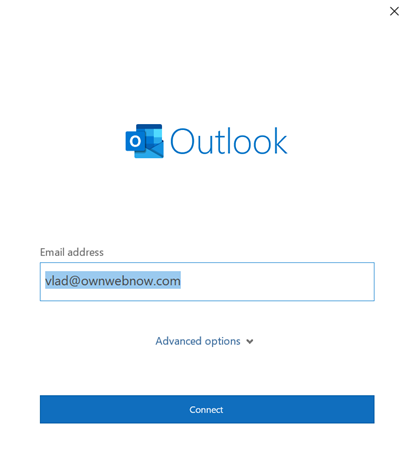
Figure 5: Outlook Welcome
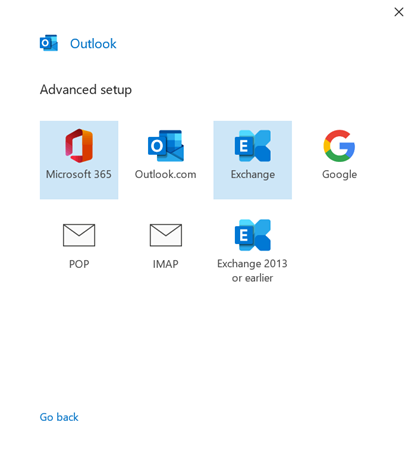
Select Exchange.
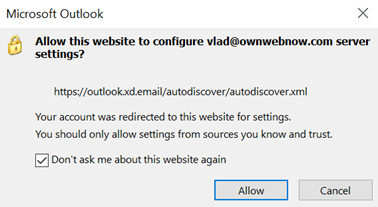
Your system will now contact the Autodiscover web service to obtain all the Microsoft Outlook configuration credentials. If it worked, you will be prompted to accept server settings:
Next you will have to provide your password.
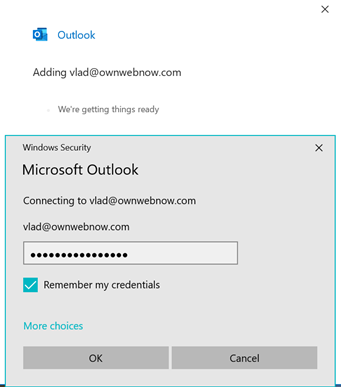
Microsoft Outlook will now authenticate with our servers and configure everything for you. Next you should see the notification that Account successfully added.
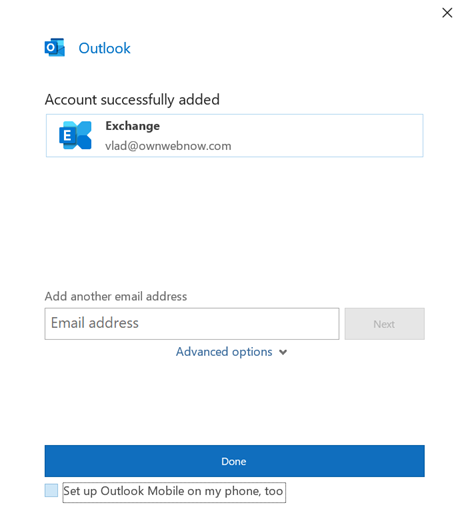
Click on the link on the bottom under Done and confirm that checkbox is not checked next to Set up Outlook Mobile on my phone, too. Figure:
That is all! You are set and ready to go. Microsoft Outlook will now continue to set everything up and in a few moments.
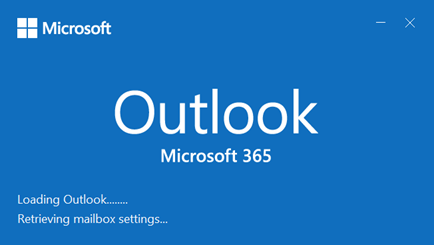
That is all, enjoy Microsoft Outlook powered by ExchangeDefender managed Exchange.
Managing Calendar Permissions
Designed for Outlook 2013/2016
Select the Calendar button in the Navigation Bar.
Select the calendar that you would like to share, right-click on the Calendar and choose Share > Calendar Permissions.
On the Permissions tab, you may add or remove users to whom you have delegated access to your calendar.
To add a new delegate, select Add… and search for the desired user by Last Name. You can search the Global Address List or your personal contacts list by selecting the appropriate dropdown menu under Address Book. Under the Permissions heading, choose the level of detail you would like to provide to the user.
To remove a delegate, select the user and choose Remove.
Choose Apply > OK.
Configuring iOS Devices (iPhone, iPad)
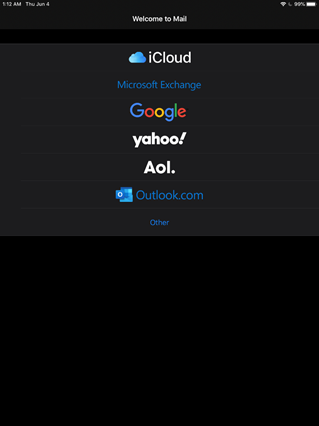
Configuring iOS Devices is very simple. Just start your Mail app and you will be prompted to setup a new account. Select Microsoft Exchange, second option from the top.
Next, you will be prompted for your account credentials. Your login credentials are the same as for Outlook Web Access.
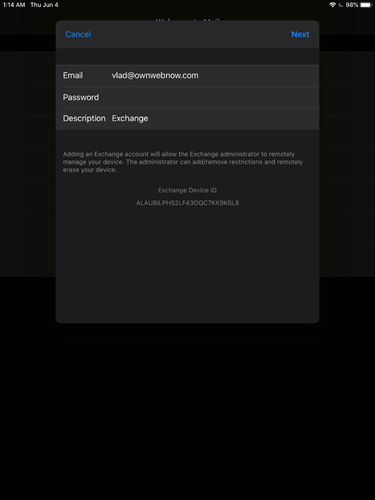
Tap on Next.
Your device will now attempt to locate the Autodiscover server and obtain all the settings.
You will be prompted to verify server identity, tap on Continue.
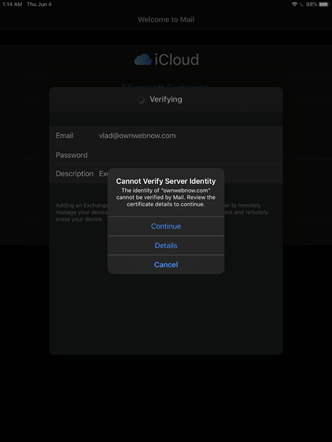
Next, you will be prompted to provide the server and login credentials, same as in the previous screen.
Server for iOS is owa.xd.email
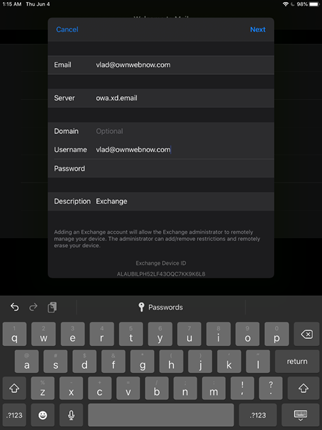
Tap on Next.
After a few minutes the device will autoconfigure and allow you to select which iOS applications should sync data with the Exchange server.
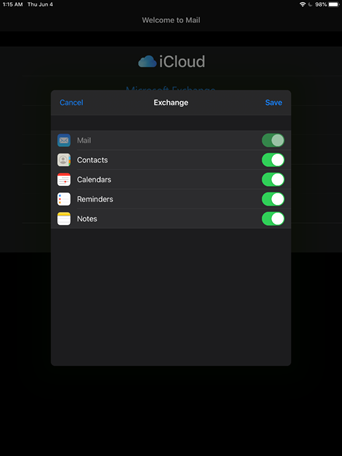
Make your selection and tap Save.
Android Setup
Android setup is very similar to iOS but most vendors use their own email app. If you choose to use the stock Android Gmail app, or other Android phone vendor email app, you will need to know your:
Server address: owa.xd.email
Username & password which are the same as the ones you use to login to https://owa.xd.email/owa/
Configuring MacOS X with ExchangeDefender Exchange
The following instructions are for MacOS Catalina, and the instructions work very similarly for all other versions of MacOS X. So long as you have your Autodiscover record configured properly, your setup process will just require your email address, password, and a few clicks along the way.
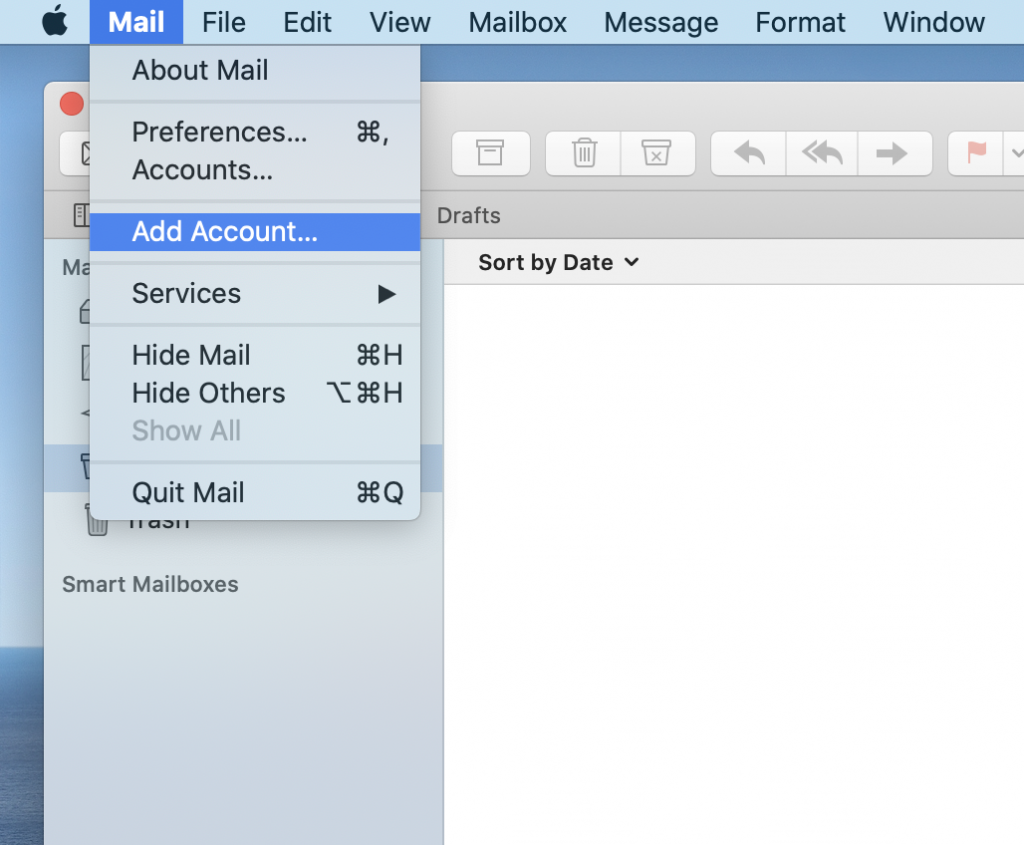
1.First, start the MacOS Mail app. If you aren’t prompted to add an account click on Mail > Add Account
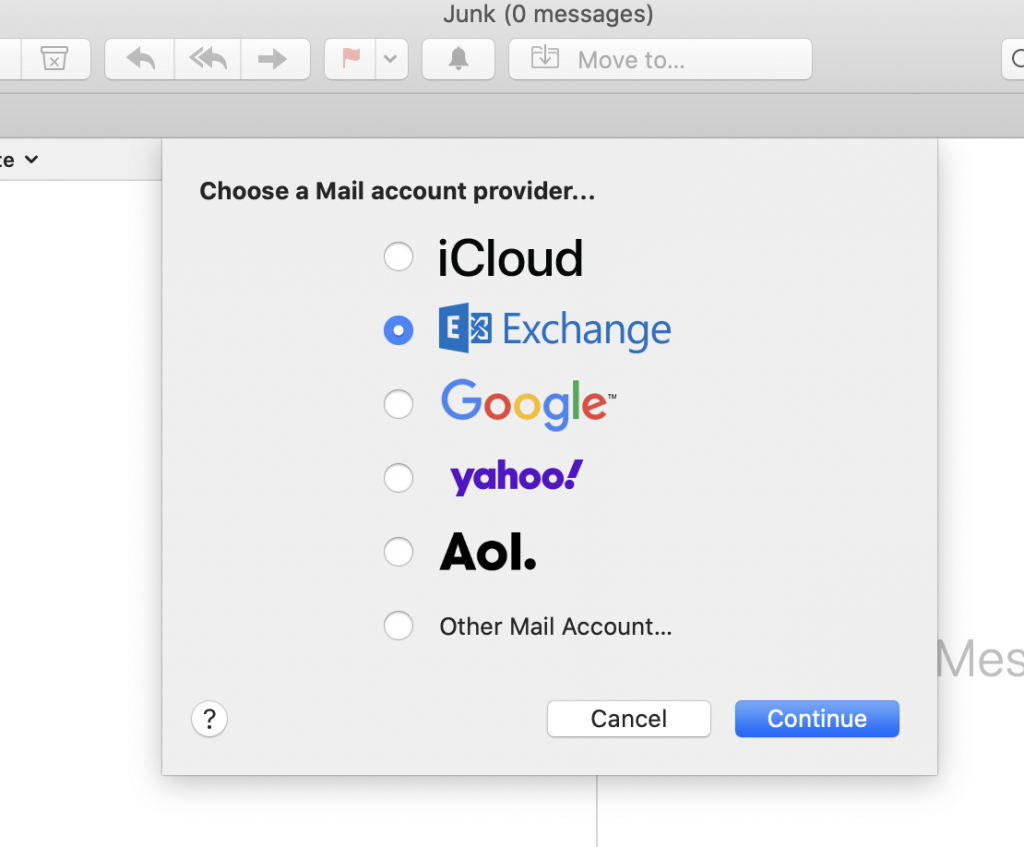
2. Select Exchange from the “Choose a Mail account provider…” screen. Click Continue.
3. You will now be prompted for your name and email address. Type them in and click Continue.
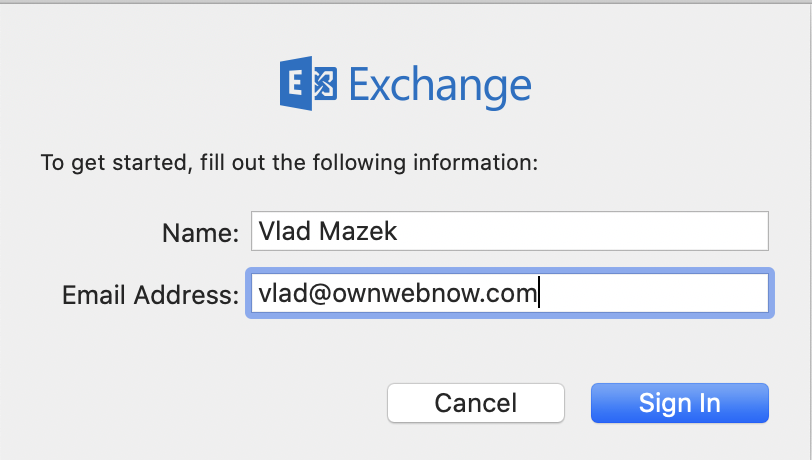
4. This is where Autodiscover kicks in. Manual setup is not supported. Click on Sign In.

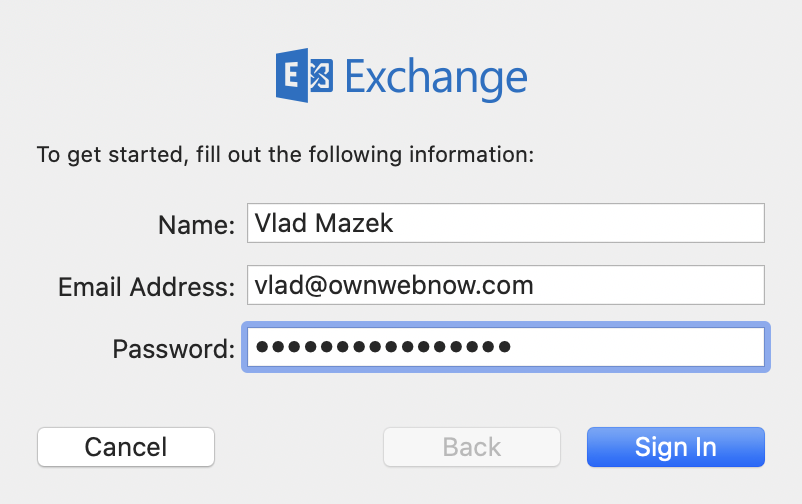
5. Type in your ExchangeDefender password and click on Sign In.
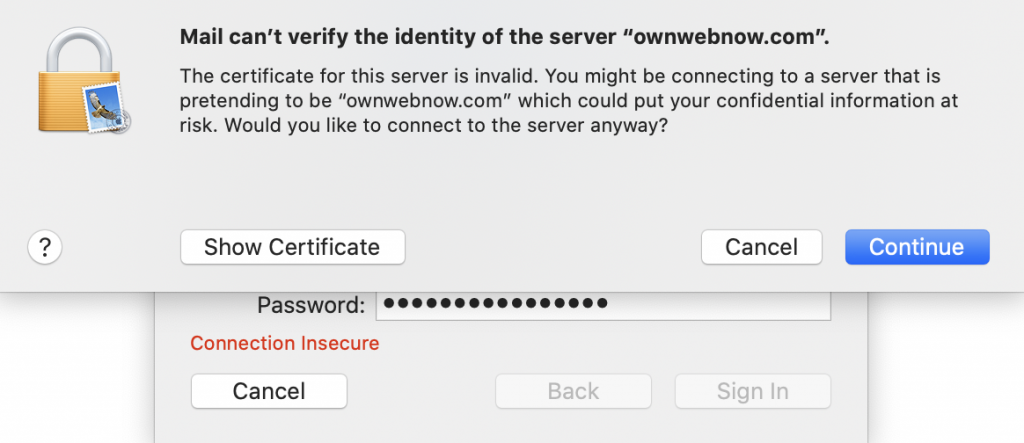
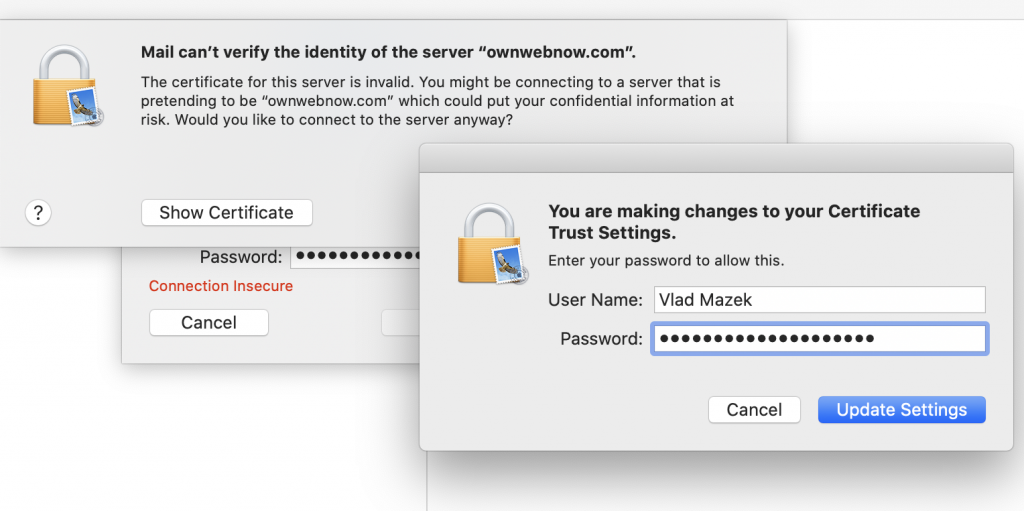
6. You will be prompted to accept an SSL certificate. Click on Continue.
7. You will now be prompted to add the certificate. Please type in your MacOS X password here. Click on Update Settings.
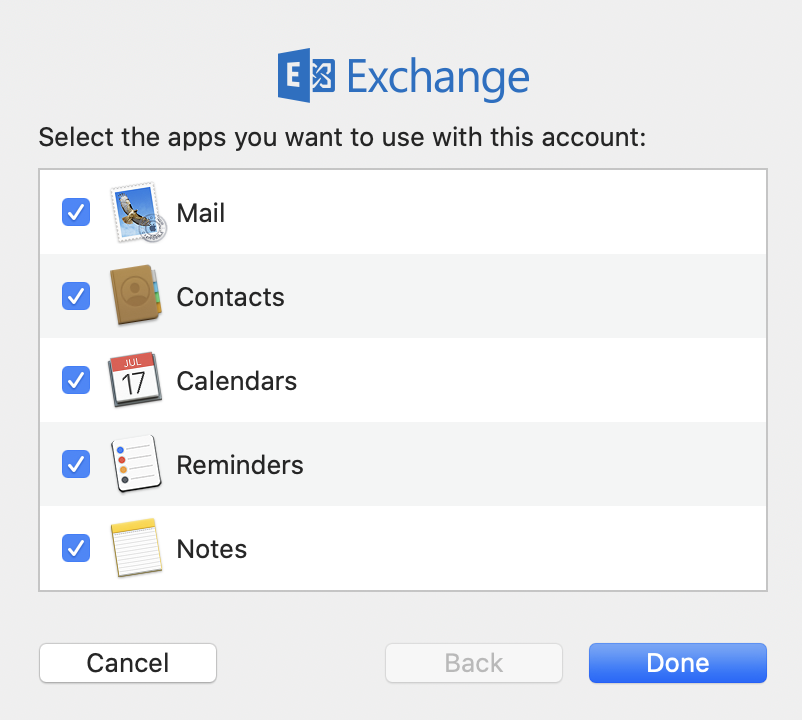
8. You will now be prompted which apps you want to have access and sync with your Exchange data. Make an appropriate selections and click Done.
Congratulations, you’re all set. Exchange will now sync with your MacOS. If you need to make changes, you can always click on Mail > Accounts and go from there.
If the process fails for any reason, make sure you have an Autodiscover record set and pointed to the right direction. Make sure you are using the right credentials, you can test them at https://owa.xd.email/owa/ and if they work there, they should work on your Mac.
Appendix A: Hacking Autodiscover
As of Microsoft Exchange 2013 and Outlook 2013, you have to use Autodiscover records to configure Outlook. Your domain administrator must create an Autodiscover record in your domain.
Hostname: Autodiscover
Host Type: CNAME
Host value: Autodiscover.xd.email
After the host is created, it can take up to 72 hours for the DNS change to propagate (most should propagate in minutes).
If you cannot modify your DNS, you can hack it by using the Windows Hosts File. This is not recommended nor supported by ExchangeDefender and will likely be blocked by your antivirus, but if you’re technically sophisticated and can troubleshoot DNS you can point the Autodiscover.yourdomain.com hostname to the IP address of Autodiscover.xd.email. This is a temporary measure only, if you cannot immediately create a DNS record in your domain, and is not supported by our team.
UPDATE: Exchange Migration
We have been keeping our partners and clients in the loop on the migration issues, around 340 accounts are still affected and we are doing everything in our power to get the last users back to productivity. As usual, all technical stuff is located on our NOC which has been updated regularly through the day/night since the first issue with legacy disconnections started:
ExchangeDefender Migration NOC Post
In the meantime:
If you are among the affected users rest assured we are doing all we can and working around the clock to get you back into your Inbox. However, just because your Outlook won’t start up doesn’t mean you cannot send and receive email from anywhere in the world. Here are the steps to enable the LiveArchive failover:
1. Go to our admin portal at https://admin.exchangedefender.com. Login as the domain admin (just type in your domain name, if you do not have the password you can get a password reminder or open a ticket with subject “LIVE ARCHIVE UNLOCK” and we’ll reset it for you)

3. After you set the password it should take 1 minute for it to apply.
4. Instruct the user to go to https://nge.exchangedefender.com. Their username is their login, their password should let them in. If you run into an issue logging in, open a ticket “LIVEARCHIVE USER” with email, password and we will reset the credentials for you.
This is not available just for the affected ExchangeDefender mailboxes, this is available and included in your service for everything we protect – public folders, shared mailboxes, etc. If a folder or user is missing just create an address as a user in admin.exchangedefender.com, enable LiveArchive, set credentials, and you’ll be back to sending/receiving email.
We are still working on this, and we will not stop until everyone is back to normal, on the new platform that will be the end of legacy Exchange issues we’ve had to contend for so long. Please stay on top of the NOC, we are doing the best we can to keep everyone updated but priority is currently on restoring access and service. If your clients are upset, understandably, please point them to LiveArchive and get them back to work, it’s functional on mobile as well as the PC. Our current status is that we’re restoring mail flow and mail access to anyone, with public folder infrastructure to follow later today.
Access to Live Archive – https://nge.exchangedefender.com/
Exchange Upgrades Complete
So far 2020 has been surprising on every level, and our legacy Exchange infrastructure was not going to be missing in action: As of May 31st, at 10 PM EST we have decommissioned our legacy Exchange and have moved everyone to the new Office365 SKU (Exchange2016/2019) to provide the best email experience Microsoft has to offer.
We do not anticipate any major issues. Months of engineering/testing/backups went into making this move as smooth as possible, and we really hope you like it.
If there is an issue, we can help:
We have increased staffing levels around the clock from May 31 – June 6th to help our clients and partners with any issues that may come up. If you run into any issues whatsoever, please keep in mind that there are two ways to get your mail even if Outlook is having issues:
Outlook Web App / Outlook Web Access
ExchangeDefender LiveArchive
https://nge.exchangedefender.com
Both of these systems will allow you to continue sending/receiving email while we we help figure out what isn’t working right. Here are the best ways to get in touch with us:
ExchangeDefender Support Portal
If you do not have an account in our support portal, please submit your issue here:
https://www.exchangedefender.com/help
If neither works, call us*:
USA (877) 546-0316
World: +1 (407) 465-6800
Support portal is the best way to get things done, but if you call or go through the 3rd party help site, we will get your issue into our portal and will work on the issue until everything is sorted out. We thank you in advance for your patience and we look forward to having you on the newer, more reliable, email experience.
Sincerely, Vlad Mazek
CEO
ExchangeDefender
Rise of “a la carte” offerings at ExchangeDefender

Traditionally, ExchangeDefender has been an email security platform, first and foremost. In order to secure your email on its way to/from your email infrastructure, your MX records needed to point at us and all your mail was secured using our platform. In May of 2020, that changed.
As of June 2020, you can offer ExchangeDefender solutions without ExchangeDefender or mail going through to us at all. It’s no secret that all the add-on cool features in ExchangeDefender (LiveArchive, Web File Server, Encryption, Compliance) are in their 3rd or 4th generation, and those services are in huge demand on their own.
You will shortly be able to purchase most of our offerings directly without the complexity of joining our partner program and without needing to implement a bunch of other features if you only need a way to securely collaborate. Our web site, ExchangeDefender.com will remain a partner-centric experience and we are introducing a new site used to manage ordering and processing of subscriptions to our a la carte services.
Our partners will be able to continue provisioning and ordering ExchangeDefender services as is. As a partner you’ll also have a choice of placing orders through the new a la carte service as well (if you don’t want to be involved in management, support, etc for your users) just without discounts and incentives (since we’ll be doing all that work now).
We strongly believe that our partner ecosystem provides a lot of value to the organizations that consider IT security to be critical to their success. The reality is that many do not, and our partners tend not to sell services to clients they deem too small or too unprofitable for the overall offering: now we have the means and ways to help them through service bundles and individual service offerings specifically designed for the cloud.
If you’d like to be on a beta test, please let us know, the new platform will launch next week!
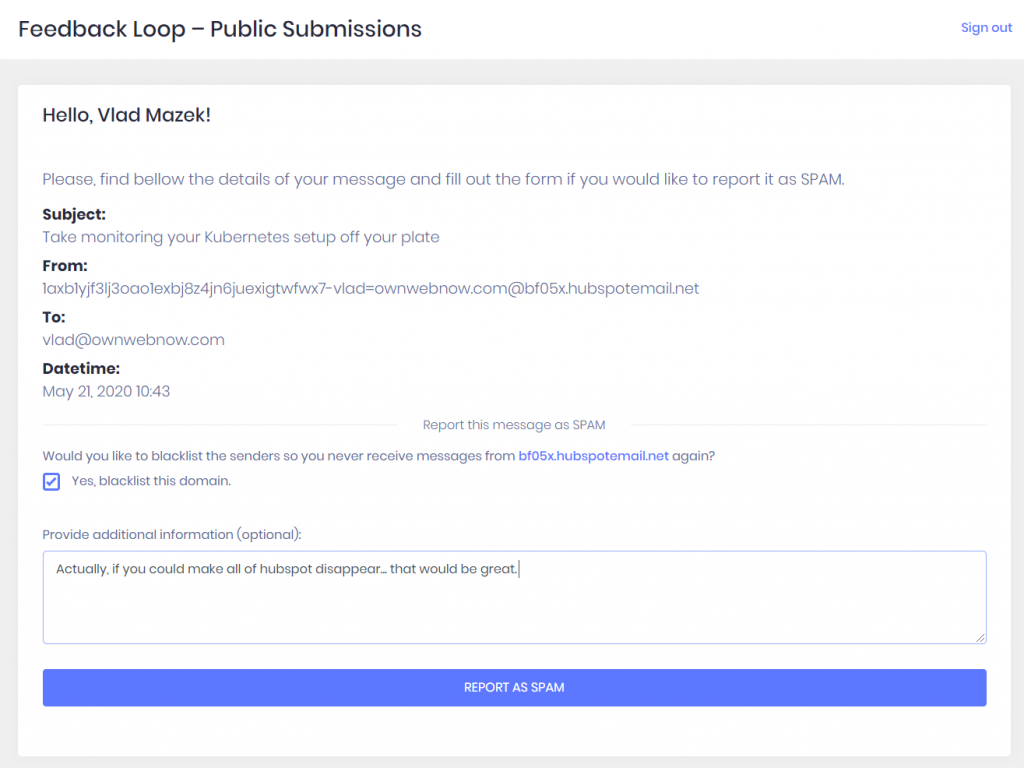
ExchangeDefender Feedback Loop – SPAM Reporting
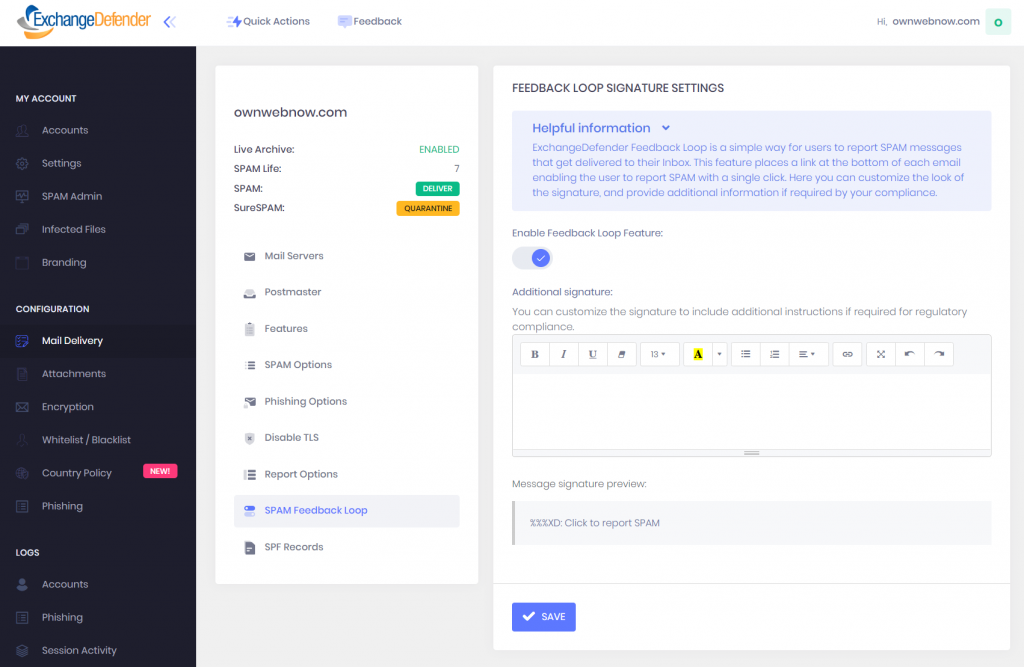
ExchangeDefender SPAM Reporting (Feedback Loop) is a simple way for users to report SPAM messages that get delivered to their Inbox. This is a user-level feature in ExchangeDefender that inserts a link at the bottom of each processed email and gives users one-click reporting and blacklist management. Service providers and domain administrators can customize the appearance of the link that is automatically inserted at the bottom of the message.
Feedback Loop Feature
Login as the domain administrator And click on Mail Delivery > SPAM Feedback Loop. Click on Enable Feedback Loop Feature, make any optional additions to the signature, and click Save.
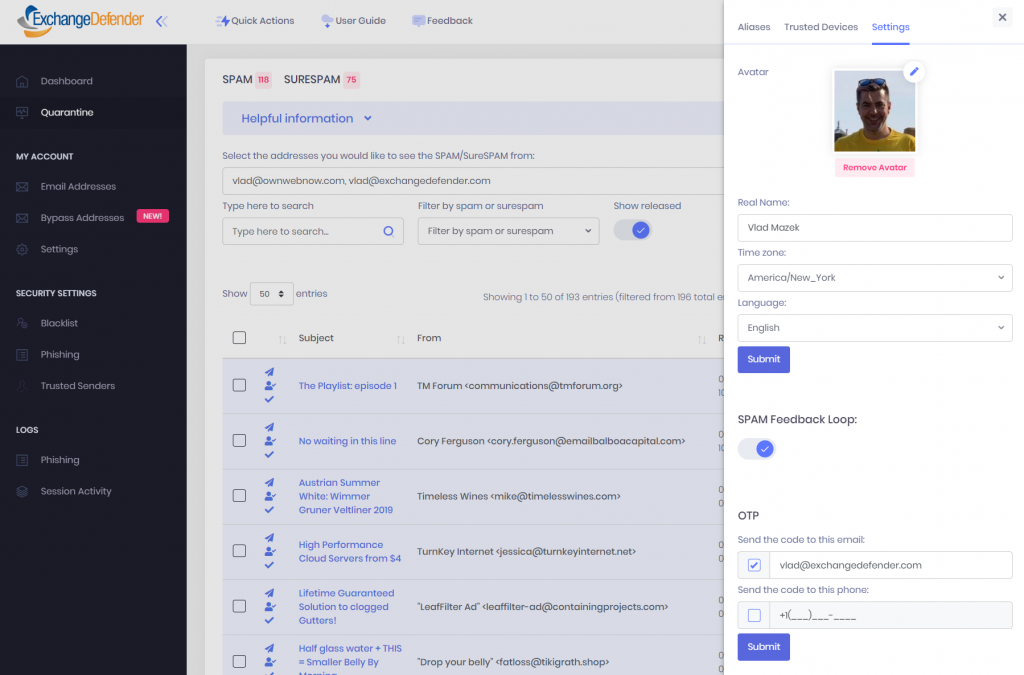
Enable Feedback Loop Reporting for Users
Once the feature has been enabled for the domain, Users will get a new feature in their Settings. Click on Settings > Settings and click on the SPAM Feedback Loop to enable signatures for email addresses associated with this user.
What does it look like?
The signature you designed on the Domain admin level will appear at the bottom of every HTML/text message that arrives in your Inbox. When the users click on the link it will open a web browser and take them to their ExchangeDefender account (if they are not logged in, they will see the login screen).
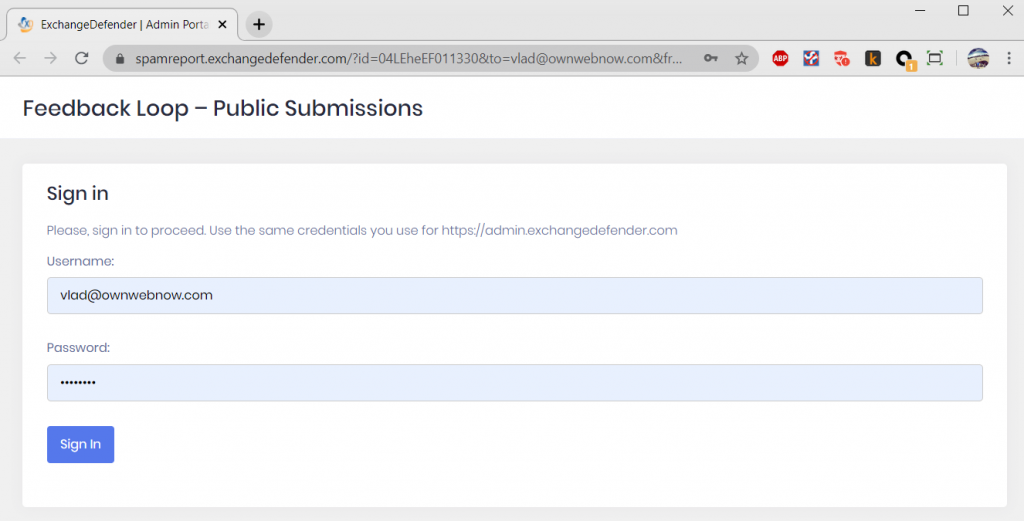
Once authenticated, the user can review the message, confirm that’s something they don’t want to see again, and we’ll look into it and make sure messages similar to the one they are reporting is not delivered to the Inbox.Users also have an option of providing feedback, uploading a copy of .msg file, as well as a checkbox that will automatically place the sender domain on a blacklist.
In conclusion, we realize that not everyone lives in Outlook or a web browser all day – so we’ve designed this process to help users that are mobile, or that interact with ExchangeDefender very infrequently – reporting and getting rid of SPAM is now just a click away. It also helps us improve the performance and accuracy of our filtering.
Try it out today!
Next Gen Live Archive Launch [Video Tour]
Today’s webinar featured the launch of ExchangeDefender’s next generation LiveArchive, showcased by CEO, Vlad Mazek.
The new Live Archive is now a webmail in its own right not dependent on Exchange, Gmail or other major email providers. You’ll have to watch the video tour to get understand the mega power of the new service but a few highlights are:
– Live Archive offers real-time archiving of all inbound and outbound mail
– The ability to send and receive email during outages and other network disruptions
– The mailbox holds up to one year of mail
– Live Archive offers immediate email failover and disaster recovery and is compatible with all email providers
Live Archive Product Page:
https://exchangedefender.com/live-archive
Live Archive Technical Features:
https://exchangedefender.com/features_livearchive.php
ExchangeDefender LiveArchive Launch!

ExchangeDefender is pleased to introduce the next generation of our email solutions.
We have supported and protected Exchange for over two decades and as well as managing security for every mail server solution on the Internet – trust us, we know email sucks. To help fix it – no matter where your email is, no matter if it’s Microsoft or Google or Amazon cloud – we needed to develop an email server that can run side by side. We are happy to show you the beginning of this adventure next Friday, where we will unveil the new product live… and a little surprise 🙂
ExchangeDefender LiveArchive is getting a major upgrade.
New, modern, responsive web interface that will make Gmail jealous. Potential not just to save your business but build a whole suite of solutions for business continuity, hybrid deployment to save licensing, backup offering, use your imagination. ExchangeDefender has built a mail server from the ground up with the focus on security that still enables your productivity. Join us and see it live! Q&A with the CEO to follow.
Join our upcoming Webinar
Friday, May 15, 11 AM
Registration URL
https://attendee.gotowebinar.com/register/5131389287702229520
We strongly recommend business decision makers and IT personnel attend this meeting. We will be going over the new service launch, implementation and deployment, user notifications, service changes, and the product roadmap. As always, all of this will be done for you and on your behalf so “if you like the email experience you have now, you’ll get to keep your email experience” so if you just want it taken care of you don’t have to do a thing. If you’d like to understand how things will be deployed, changed, and upgraded then please make sure you attend.
Vlad
CEO ExchangeDefender
Brand New Corporate Encryption UI [Quick Tour]
ExchangeDefender Encryption enables organizations to securely send, receive, and manage confidential email, providing an easy, seamless way to implement content protection. ExchangeDefender uses bank-grade Encryption with 256-bit keys, to secure all encrypted emails.
We are proud to announce the brand new interface and full feature functionality and reporting for ExchangeDefender’s Corporate Encryption.
Let’s take a quick tour!
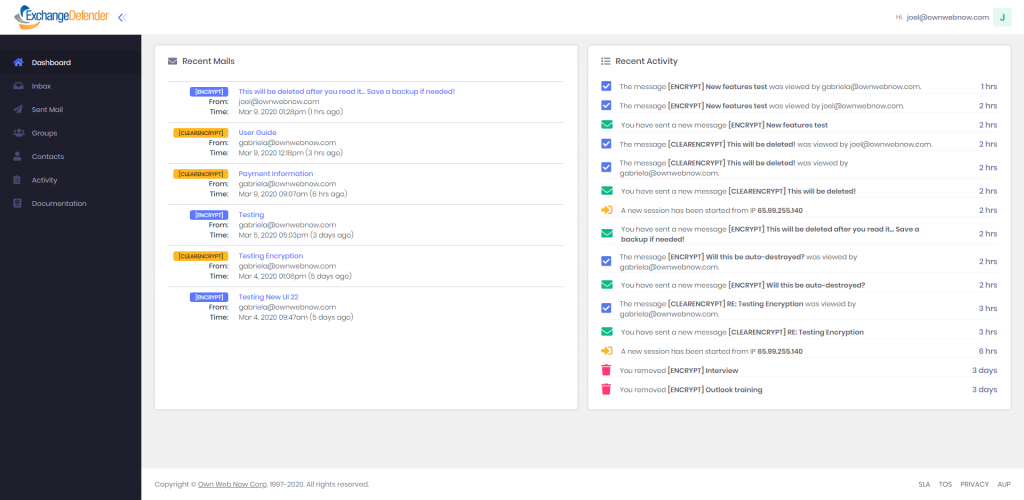
This is Corporate Encryption’s brand new dashboard view. It is the first page you see after logging in. Your recent messages and recent portal activity is available on your dashboard.
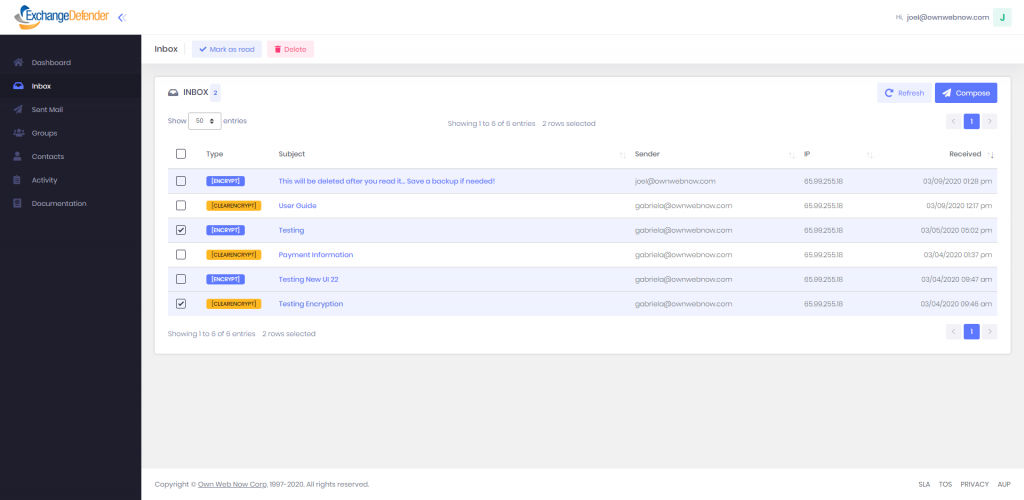
You can access your messages by tapping the Inbox tab. You can compose an encrypted message from this page. Encryption offers two levels of encryption, categorized by ENCRYPT and CLEARENCRYPT, and encrypts all email and attachments on every server where they reside.
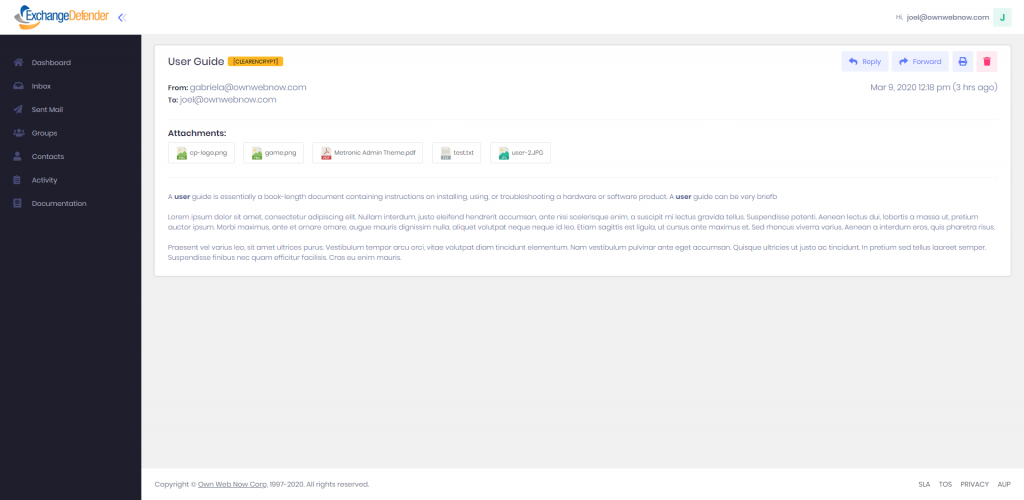

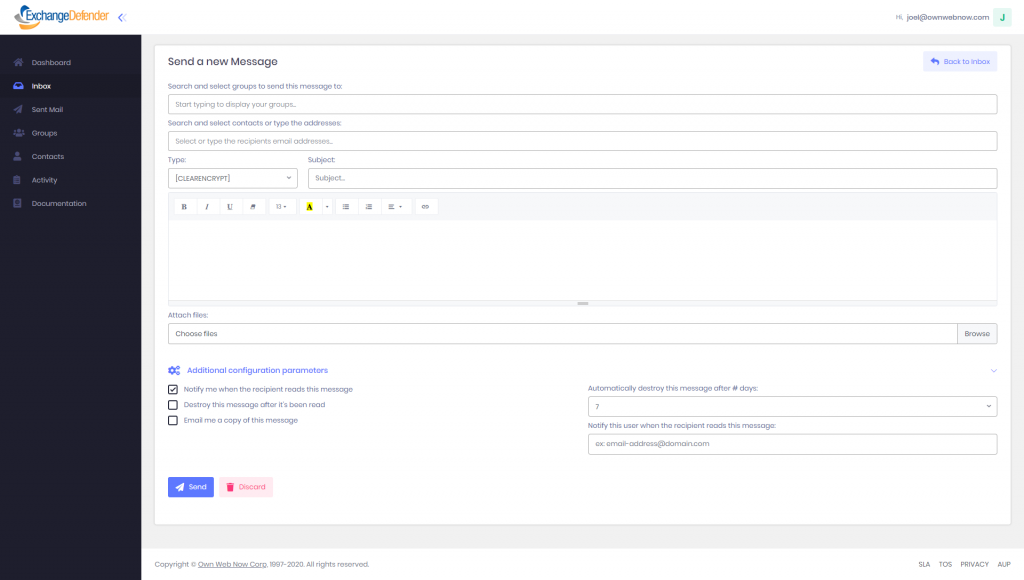
The new web interface is sleek and modern, we have minimized the number of pages you visit to get things done. Finally, same page, one-click and done. You can select a recipient or a group to send the message to, the level of encryption, and even attach files.
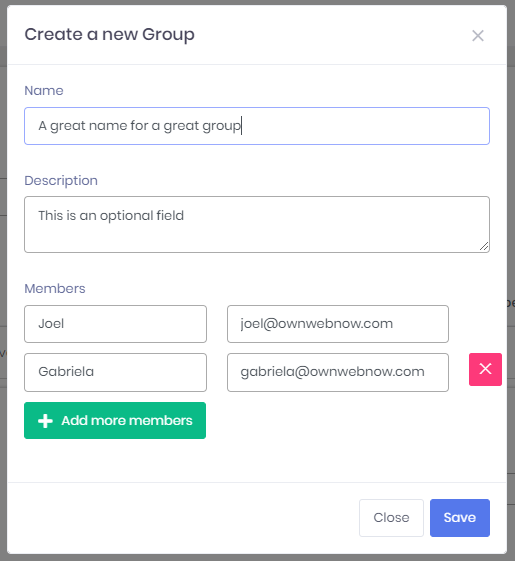

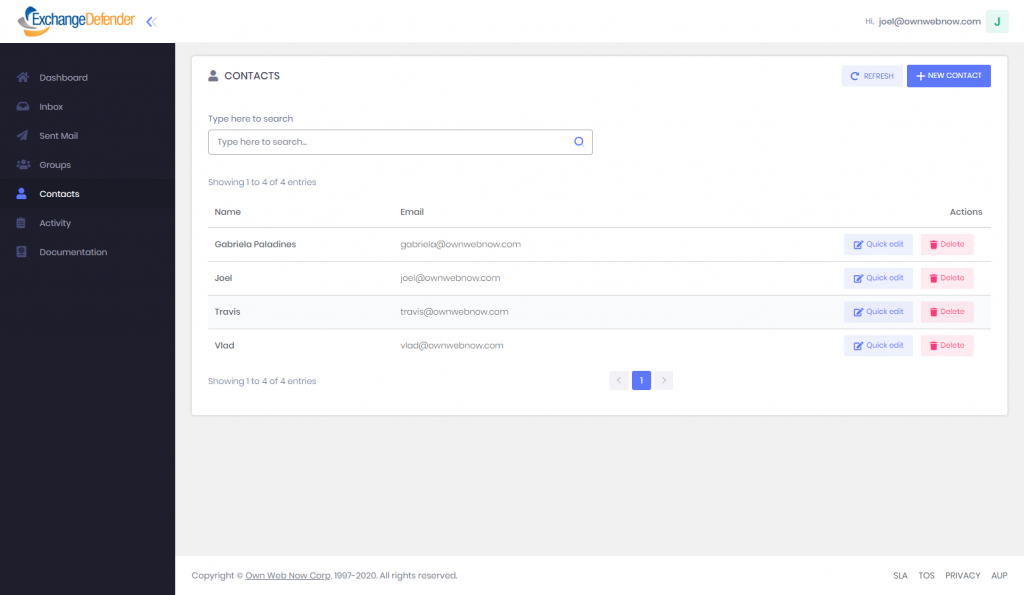
Encryption enables you to create groups for contacts list to make it easier and faster for you to communicate with your most popular contacts. You can add as many groups and as many contacts as you like. By clicking your Contacts tab, you can create a new contact, and you can access information on all of your important clients.
To access ExchangeDefender Corporate Encryption, visit encryption.exchangedefender.com or login to your ExchangeDefender Admin portal > Quick Launch > Encryption
Killing Spam from the Quarantine

On March 12th our entire team left our offices and everyone has been working remotely, nearly around the clock, to keep everyone secure and productive. I returned from Los Angeles on a redeye flight, held a quick meeting in our parking lot 10 feet away from everyone – and nobody has been to the office since. I wanted to write a brief note to our clients and partners to let you know how we’re doing and what we are up to.
Technical Toll
Managing a massive international operation, that spans continents and data centers that have taken similar work-from-home precaution, has been a massive technical challenge. Just because we’re not there doesn’t mean that hard drives don’t die, that servers don’t melt down, that switches and firewalls and routers don’t go through their usual cycles. Thankfully the technical changes we’ve made to our cloud in 2017-2018 have made it possible for us to keep service levels at normal levels.
The load on our tech has increased steadily – I’m sure you’ve noticed that every single person you’ve ever interacted with has emailed you about their Covid-19 policy. You’ve probably also gotten an email from every loan scam operation on the planet trying to get you PPP/EIDL.
Perhaps most regretfully, the scum of the earth that we exist to eradicate has picked up their activity exponentially. Never in my life have I seen charts and load graphs like we’ve experienced over the past month. Hackers and scammers know that most people are working from home, where IT security is mostly non-existent, and that makes all those endpoints ripe for hacking. Which immediately becomes a source of SPAM and more malware.
Things were bad before, now they are bad x ugly. And we’ve been working around the clock to keep the threats quarantined.
Personal Toll
IT security is a passion of everyone that works here. We’ve built all the infrastructure, systems, monitoring, reporting – you name it – so when someone finds a way to get SPAM through it’s a very personal failure for our team.
Most of us live in Florida, where just about everything has been shut down (I’m sure you’ve read about Tom Brady getting kicked out of a public park). Have I mentioned how much I love my team? We have all been working far, far, far longer hours during the quarantine than we ever have before. We have system upgrades, software upgrades, new features, and some more exciting stuff that our partners and clients are going to need in order to save money after this quarantine ends. Needless to say, we’re tired.Nerves have also been on a somewhat of a thin line. We have a young-ish staff and most of us have families for whom we are not just providers but suddenly school teachers. Our partners and clients are in a similar boat. Those home frustrations can get even more pronounced when technology fails – and we have done our best to brush off some rather abusive behavior in the support portal. I get it, everything in the world is frustrating you, you’re losing control and visibility in general, and now you’ve got IT problems too. We keep on repeating “We’re here to serve, we’re here to help, we’re sorry for the inconvenience” and at no point in the past has this been more true than it is today.So overworked, cranky, abused, and locked down – but we’re still here. And we know most of you are in the same boat, sharing the same frustration. Hang in there, we’ll need to be at our best for the huge challenge that awaits us in supporting our clients as they get back to normal.
In Conclusion
In conclusion, I have the best team on the planet and I am so happy that we can keep you safe and productive during this uncertain time. I owe a debt of gratitude to them that I will repay eventually. But first, foremost, and most important – thank you. As large of a footprint as we may have, we are still a small business and thanks to our clients loyalty we have been able to continue working, growing, and serving during the time that many businesses have had to turn to the government for a bailout. My team and I are eternally grateful. People like to say “shop small business” but I have lost the count of times that we’ve been fired for Office 365 or a competitor that was even a penny cheaper – cause there are sentiments and then there is business. I get it. And at the same time we are so thankful that you’ve kept on supporting our business, I promise you nobody here is going to forget it — this is why we work so hard for our clients and I can’t wait to show you how we’re going to help next.
Sincerely,
Vlad Mazek
CEO
Own Web Now Corp
P.S. Nearly two decades ago I wrote the first version of ExchangeDefender – and in my infinite wisdom and English as a second language, I used “quarantine” as the term for SPAM that I kept out of your inbox. I’m less amused that a global apocalypse has validated the choice of that term.
New Release: Web File Server UI [Quick Tour]
ExchangeDefender’s Web File Server, a secure document sharing and collaboration platform, is one of our most popular services this year. It offers businesses the ability to upload, manage and share files securely with coworkers or vendors. Our file sharing system makes it easy to quickly share a ton of large files without relying on email, clunky file servers, or cloud services primarily designed for file sync.
We are proud to announce the full release of Web File Server with full functionality and fresh new look.
Let’s take a quick tour:
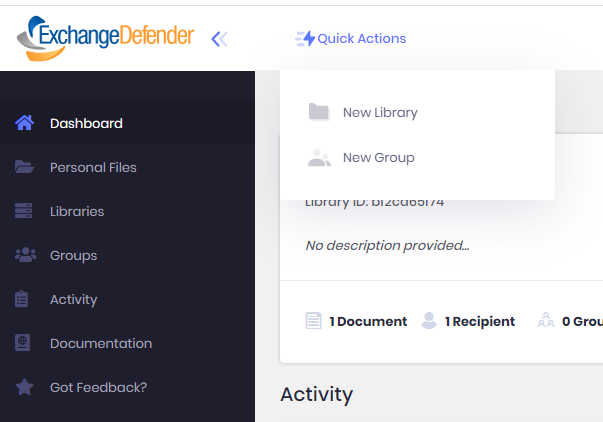
WFS Dashboard
From here users will be able to see an overview of their featured libraries. The last uploaded files to any of heir libraries and the last 15 events related to their libraries/documents/accounts.
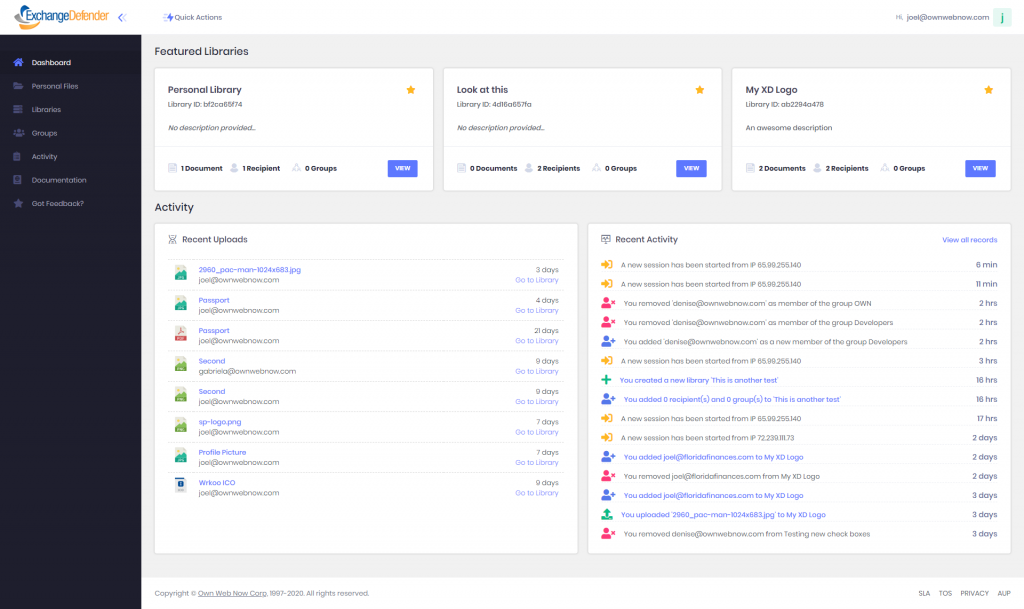
The functions to add new libraries and groups, were added to the “Quick Actions” options. That way users will have them available from anywhere within the portal.
Libraries
To create a new Library, the form was simplified to the following options:
- Custom name and description
- You can set up a custom password to protect the library. Recipients will need that password in order to be able to see the library (optional)
- You can set up an expiration time (optional)
- Customize your notifications configuration
- Customize the library permissions

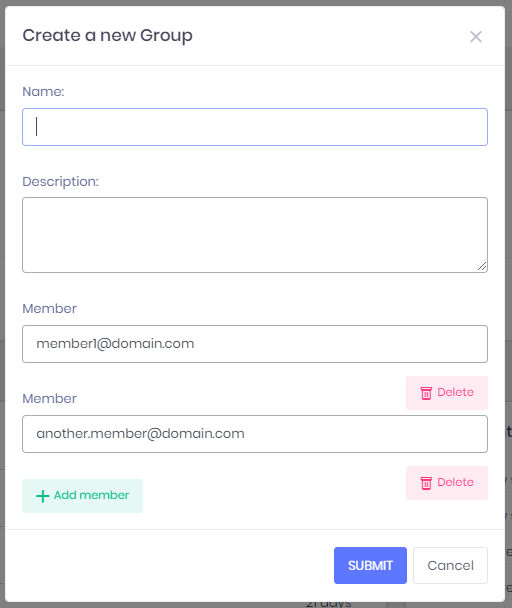
To create a new Group, users must type a name, add a description (optional), and add as many recipients as they need.
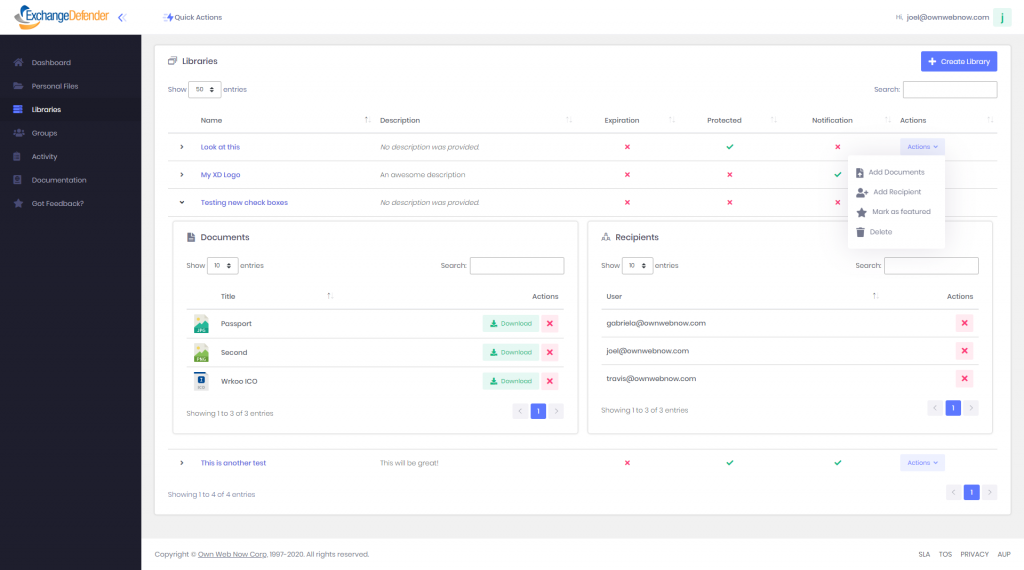
From the list of libraries, users will have the ability to see each Library’s configuration, and the option to display the tables of their documents and recipients. You’ll also have the ability to add/delete documents, add/delete recipients, mark a library as featured, and delete a library. This was with the intention to let users to manage their libraries without going to a different view.
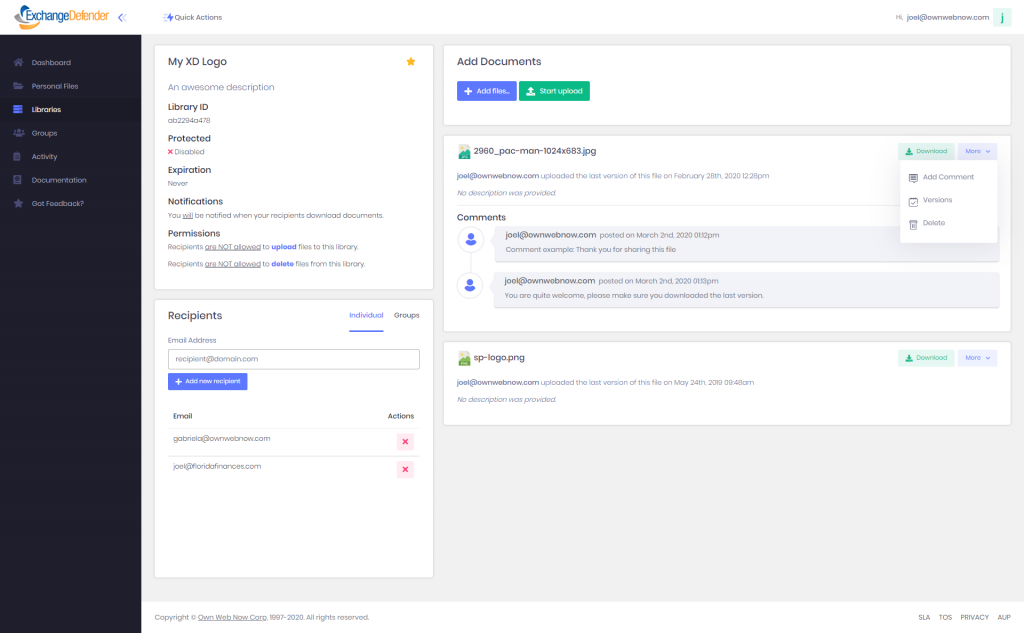
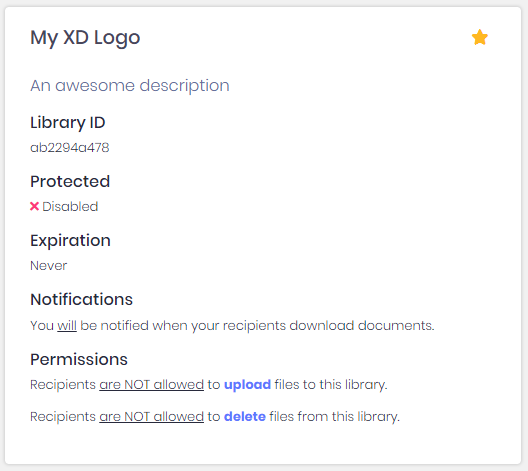
If you select one Library, you’ll be able to see all the Library’s information, including its configuration, individual recipients, groups, and files.
The documents will be displayed showing their name, who and when uploaded the last version, and description. Comments are displayed right below each file’s information. you’ll also have more options to choose from their documents list, such as Add comments, see each document’s versions and delete.
If you click on “Add a comment”, an inline form will be displayed at the bottom of the last comment.
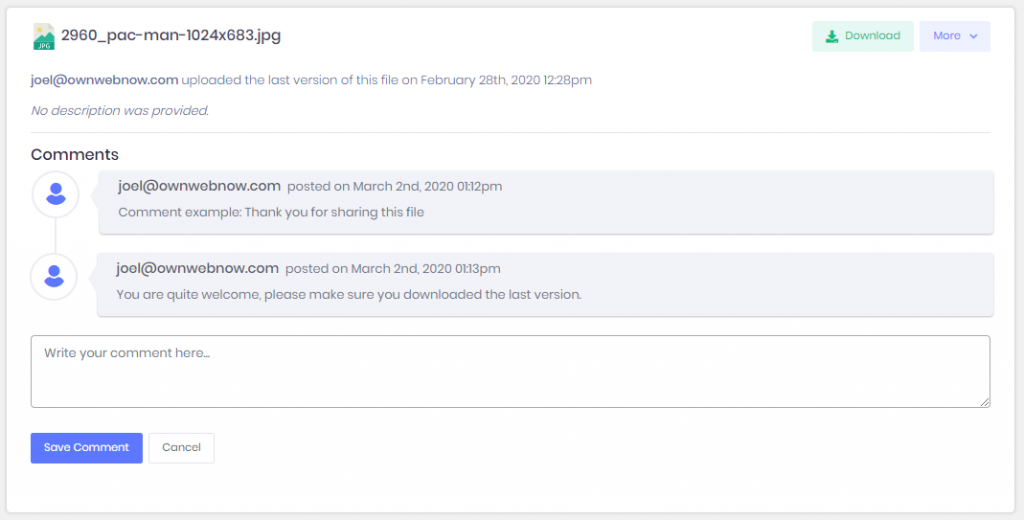
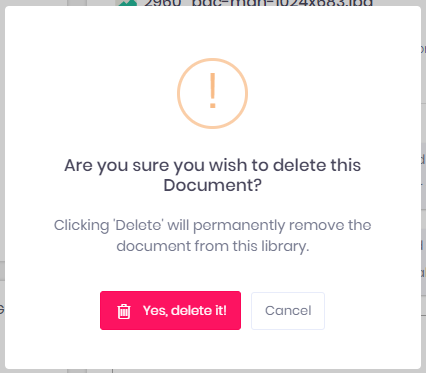
If they click on “Delete”, a confirmation box will be displayed where they have to confirm/reject the action.
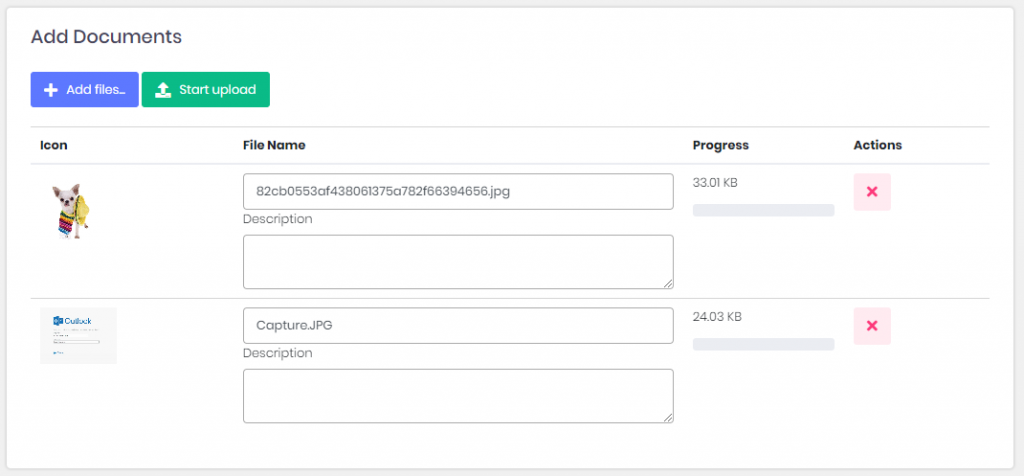
To add new documents, click on the button “+ Add files…” and select as many documents as you need (each document cannot exceed 500MB), then set the name and description of your preference and click the button “Start upload” to upload the documents to the server.
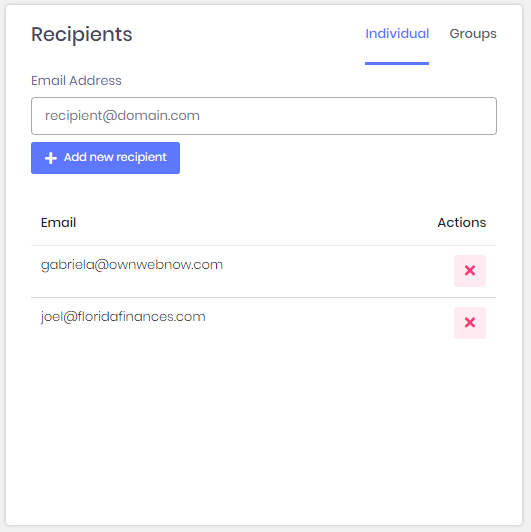
To manage the Library’s recipients/groups, find the box right below the box with that contains the Library’s information. From there you will be able to add more recipients or groups and delete.
To mark/unmark a library as featured, simply click the star located at the right-top of the information box.
Groups allow users to add multiple recipients to multiple libraries without the need of add recipients one by one each time. (please find a better way to explain this).From the groups list, users will be able to see their groups and their members, add/delete members and delete an existent group.

To Access Web File Server:
1 – Simply visit: wfs.exchangedefender.com
2 – Login to admin.exchangedefender.com > Quick Launch > Web File Server
3 – Visit www.exchangedefender.com > Login > Web File Server